Yuba Cargo Bike Rebuild

My sister told me she was thinking about getting an electric kid hauler bike so I started to look around for one. Electric bikes are a drag in that they're kind of like cellphones. Once the tech gets a little old, nobody wants them and then they end up getting chucked. This is so much different than normal bicycles where you can get a 30 year old bike ridable pretty quickly. My usual strategy for bikes is finding something that needs a little work and fixing it, but this wasn't possible for any of the electric kid haulers I was seeing. Also, most of the nicer ones use Bosch motors which are completely locked down and need to go to the bike shop to get any electrical components replaced or fixed using special software only bike shops have. This will be the end of an old man ranting about electric bikes and now I'll get onto the the project...
Yuba Spicy Curry
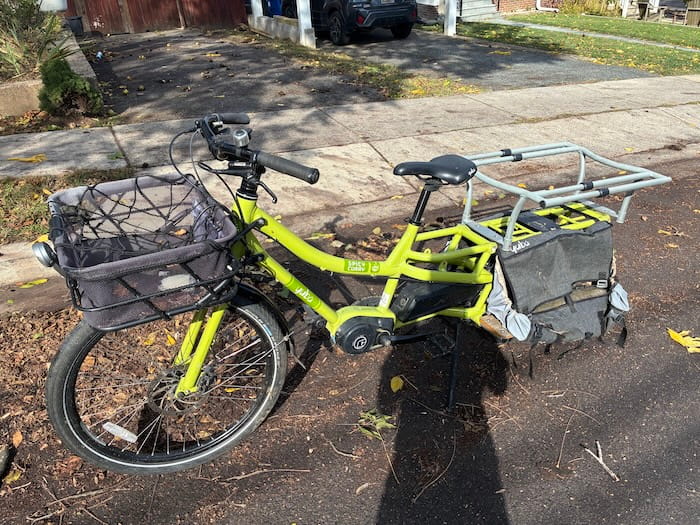
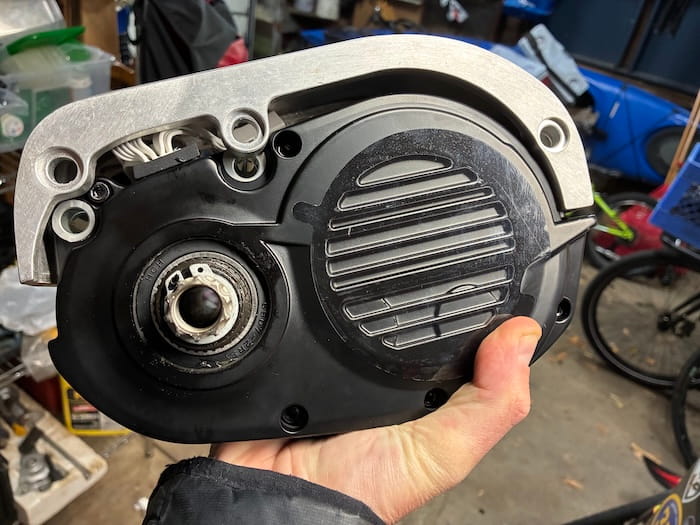
I put feelers out for an electric bike that needed work and someone on Facebook messaged me that they had a broken Yuba Spicy Curry electric kid hauler bike with a dead motor that I could have for free. I went over to look at it and it's a higher quality one and everything was there so I took it. After some research... this is the first version of this bike which uses a TranzX/Currie Tech motor. This motor company is completely out of business with no path to repair the motor or get parts. The motor mounts to the frame are also proprietary to only this motor so there's no easy way to mount a new motor onto it. * Note the rant in the prior paragraph. I guess I wasn't done ranting. *
The original plan was to fabricate an adapter to convert the proprietary motor mounts to a newer motor. I was going to design and 3D print plastic prototypes until I got the dimensions right, and then send the 3D model files out to a CNC shop to get a piece of metal cut exactly to the right dimensions. I started to down this route, but realized this would end up putting the motor and pedals way too low to the ground causing the pedals to smack into the pavement on turns. Towards the end of this project I found someone else online who did go this route and made it work nicely with a Bafang BBSHD kit.
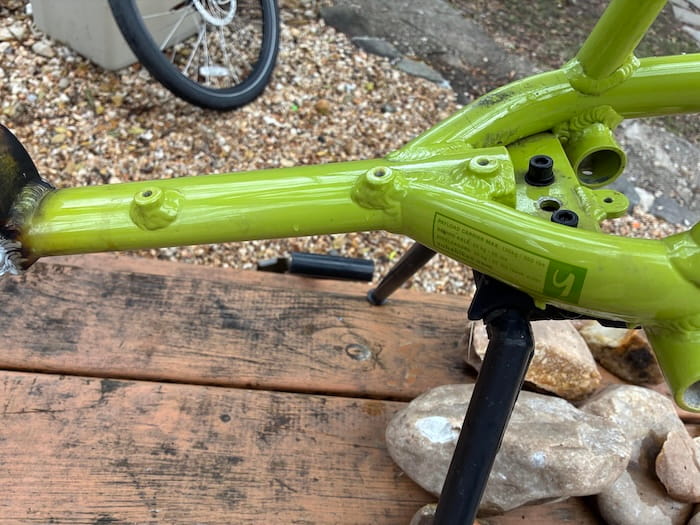
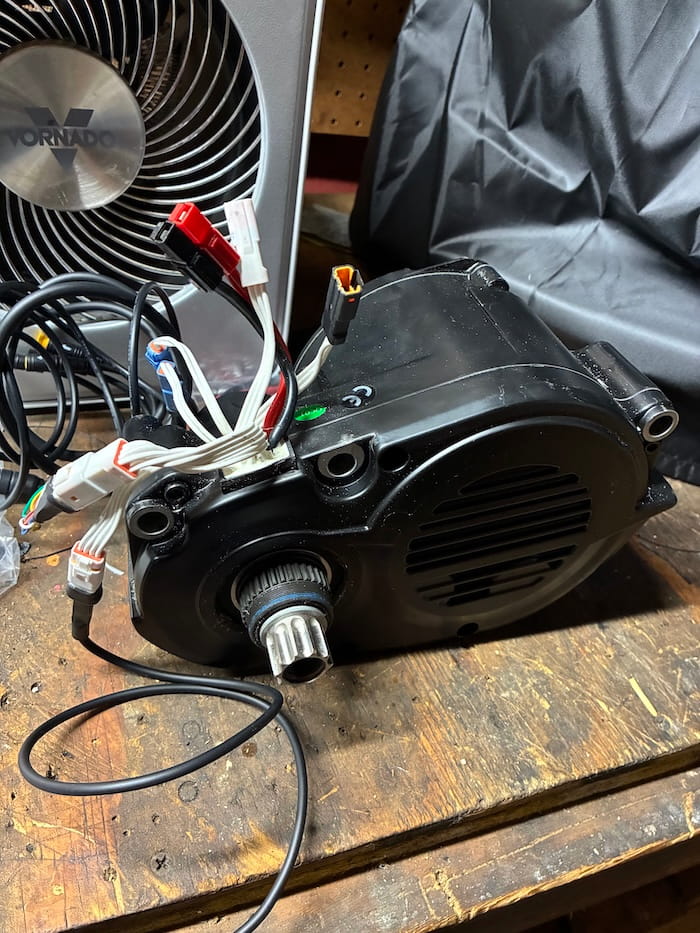
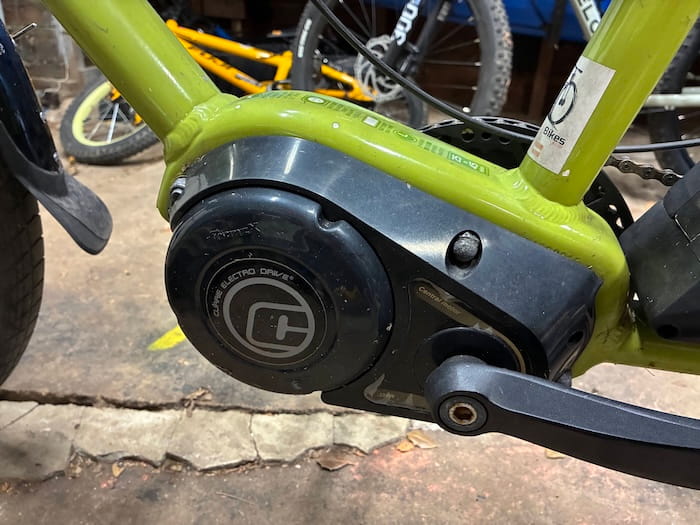
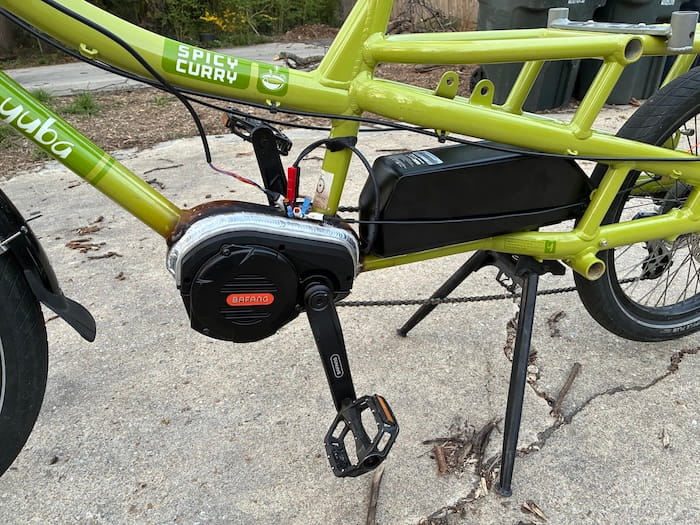
The original plan was no good so then I thought about otherways to get a new motor onto this thing. I had been browsing a few electric bike conversion subbreddits and the Bafang motor systems seem to be what everyone recommended. All the parts just plug in and work, there are tons of guides, and even videos online of people cracking open the motors to fix them. I ended up getting a Bafang M620 Mid-drive Motor Kit from GreenBikeKit. There was a slightly newer more powerful motor (Bafang M630), but this one came with all the sensors and parts for a conversion including a ready to weld alumnimum motor basket. I decided that the plan was to grind off some of the old motor basket and weld in this new one.
Everything took about 45 days to get here I assume on a boat from China and I started to think about the welding work. I'm comfortable welding steel after the Kinetic Sculpture Racer and started to watch a lot of videos on TIG welding aluminum. I have a fluxcore MIG/Lift TIG welding setup, but would likely need a proper TIG welder with gas to do this properly. I also watched a lot of videos on laser welders which look amazing, but are way too big a purchase given how little I'd use it. Part of being good at building things is realizing when to hire a professional and this was one of those situations. This would be the first time I'd welded aluminum, I would need to buy a bunch of tools I'd rarley use, I don't want the motor falling out of this bike when my wife or I I ride it, and it may take another 45 days to get a new motor basket from China if I melted this one too much welding it. I decided I'd have someone else handle this part.
Cole up at Regal Metalworks in Cumberland, PA is someone I know from hosting the Turnbull DCs Scooter Rally up at the Breezewood Dirtbike Track. He'd helped me powdercoat my vintage tandem bike and had also been building custom BMX frames lately. I took the bike up there, explained the project to him, browsed around everything else he's working on, and was happy a professional was handling this. I also rode his little Z50 mini-bike converted to electric which is scary fast for how small it is.

I cleaned off the bike and started to tune up everything else and it was all in shockingly good shape. The tires were good and all I did initially was put on a new chain, brake pads, and tune up the deraileur.
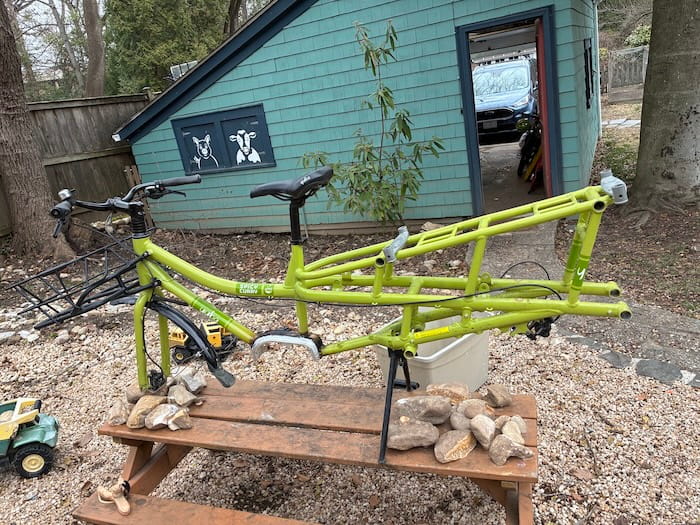
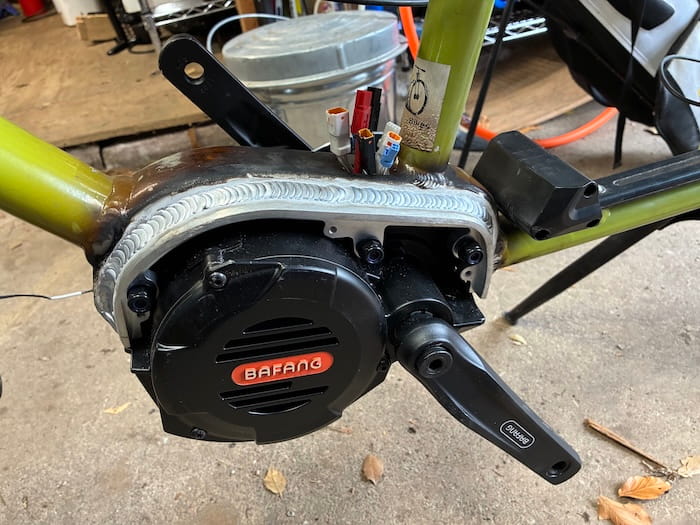
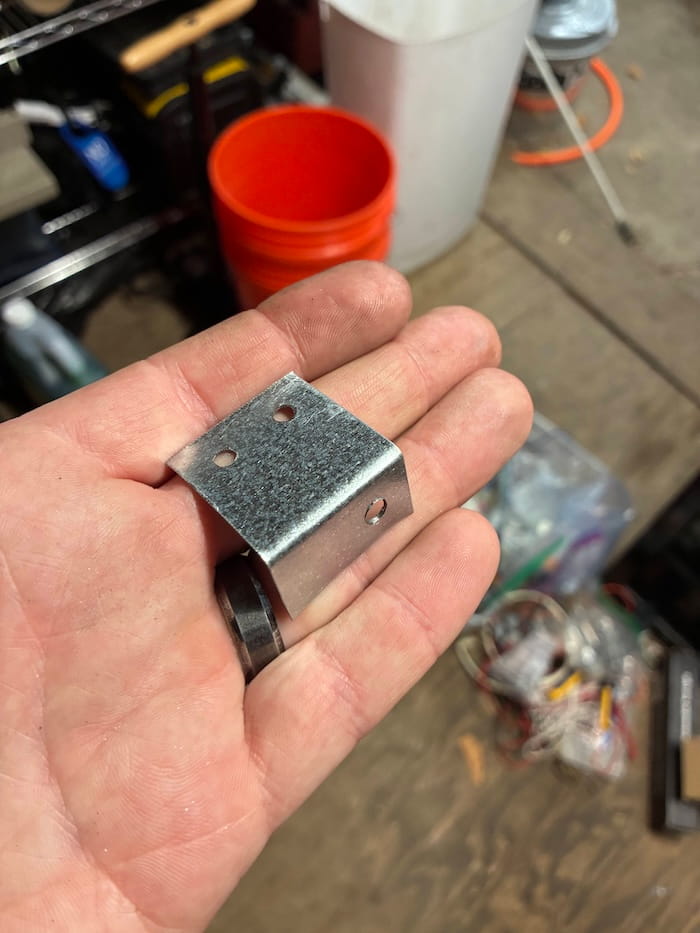
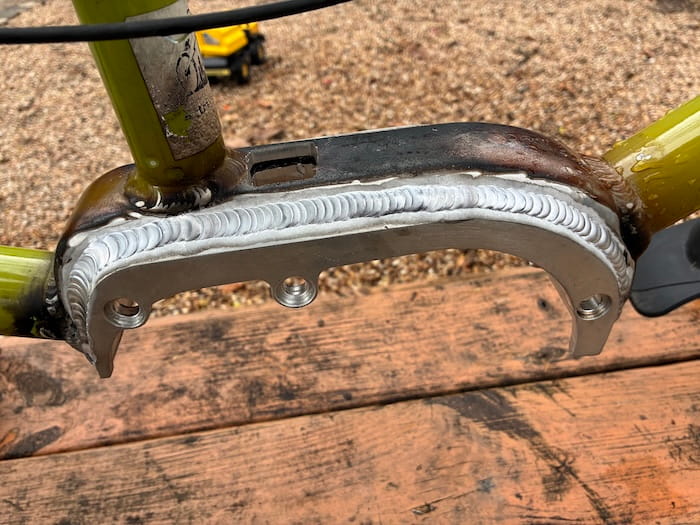
A month after dropping the bike, I went back up to PA to hitup the Philly Bike Expo and then drive west to see my mom in Lancaster and then grab the bike. WOW did the welding work turn out good. It looked professional, I was sure was stronger than whatever I would have done, and was also confident Cole got the alignment of everything correct. He also cut a small square on the top of the motor basket for where all the wiring comes out of the motor. I headed home happy that the toughest part of the project was now behind me.
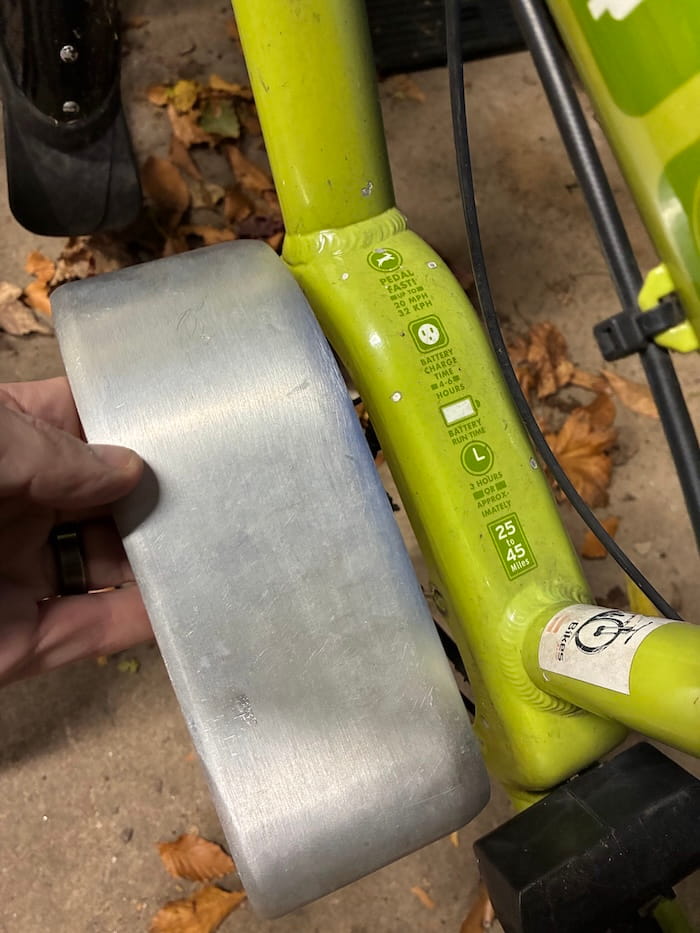
I mounted up the motor, put the bike back together and wired up a few sensors to see if I could get it going. The motor kit did not come with a battery, but there are shippers in the US who sent one quickly so that was easy and the old battery mounts fit the new battery bracket. I hooked up the controller on the handlebar and the battery to the motor and sure enough the e-assist worked. I realized it would only work for about 5 seconds and then throws an error code related to the speed sensor missing. I wired up the speed sensor to the back wheel and then was able to ride the bike around. I had a lot of fun at this point just riding it around the neighborhood and kept all the wiring held on with velcro ties until I was able to finalize all of it and clean it up.
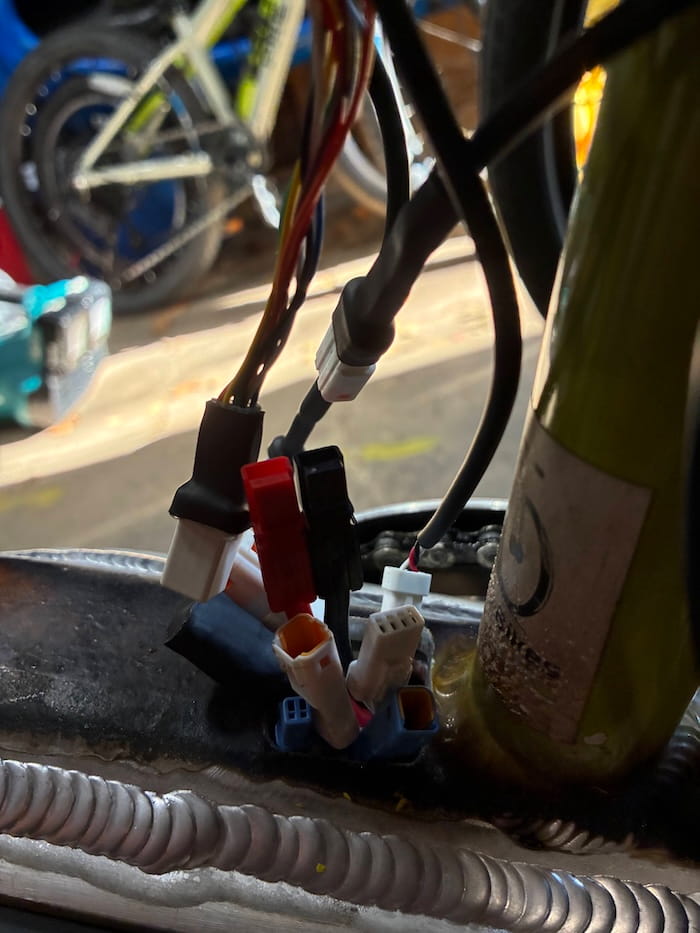
These motor kits come with optional brake sensors and also front and rear lights so I started to hook all of that up. You can turn the front and back lights on from the handlebar controller and the brake sensors even trigger the rear light brightness which is really nice for anyone behind you to see you're slowing down. The brake sensors will also instantly cut power to the motor as soon as either brake is pulled. These sensors are a little finicky to get working since they're based on switches on the brake bodies and magnets you stick on the levers being close and then separating when the brakes are pulled. How well these work and fit is very dependent on the brake lever design. I ended up putting these over the bite adjustment screws on the brake levers which isn't ideal, but liveable and they work reliably there.
There were two bits that didn't come with the kit, but I wanted to go all out and the motor had connections for them. I ordered a throttle and also a shift sensor. The throttle lets you get the bike going without even pedalling it and the shift sensor cuts motor power for a second whenever you shift so the gears don't get too mashed. The throttle essensially makes this thing feel like a scooter which I'll get into later. The shift sensor honestly I don't think is necessary, but detects movement in the shift cable and does it's job to briefly cut power.
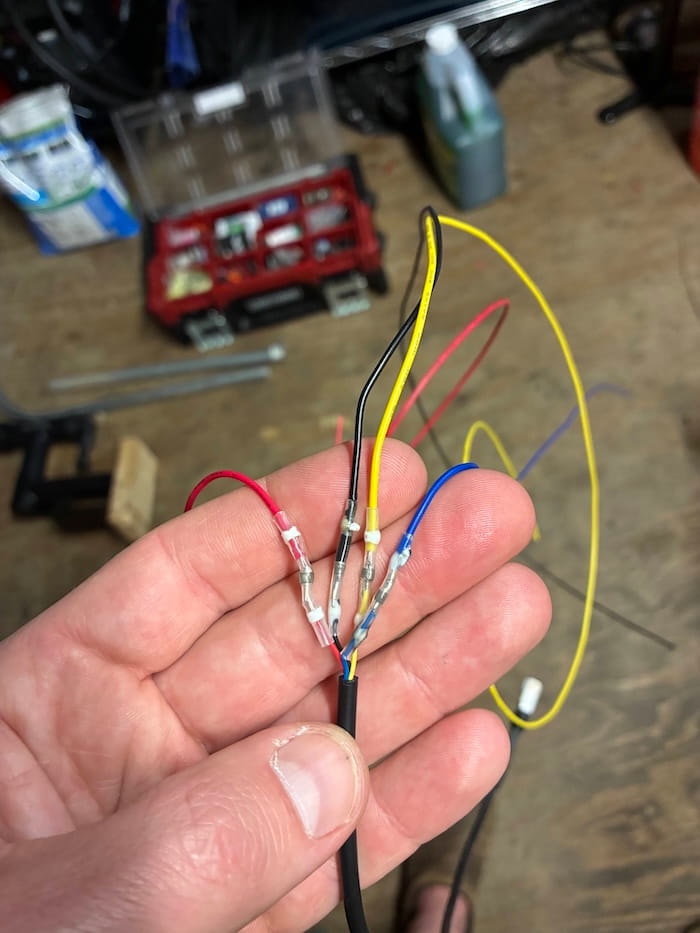
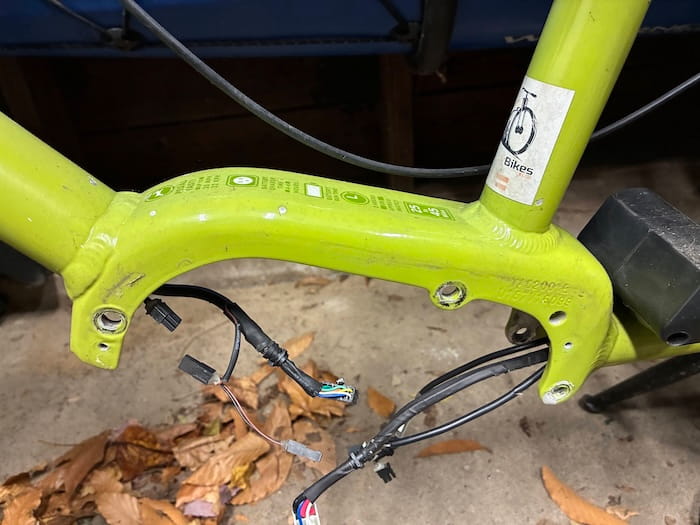
So I had everything working in terms of the electronics and now it was time to start to make it look really clean. I shortend the wiring for lights which was pretty easy and sealed it up with heatshrink. The trickiest bit was I had to add about 8" to the speed sensor to route the wiring higher and out of the way of the battery. There were four small wires inside and I'd done similar small wiring work on the arcade cabinet project. The very easy way to join small wires like these is with meltable connectors that have solder inside and heatshrink included. Don't even bother trying to solder small wires like these because these are so easy and reliable to use. I was pleasantly surprised when the speed sensor worked and I started to replace all the temporary velcro ties with cable ties to tidy everything up. I also used mesh cable organizer to group cable runs together which looked cleaner than a clump of cables next to each other.

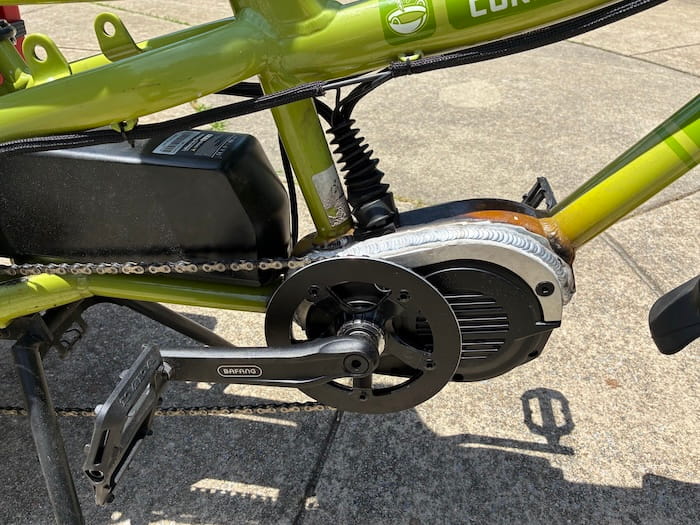
The wiring coming up out of the motor basket still looked sketchy and this is the one area I did want to try to keep water out of. I put a small square of adhesive foam around the motor basket cutout to keep water from running into it, and then found a rubber cable bellow part for a boat motor that would work. This was a little too small and I really had to fight to get all the wiring into it, but it turned out looking decent enough and would keep most water out.
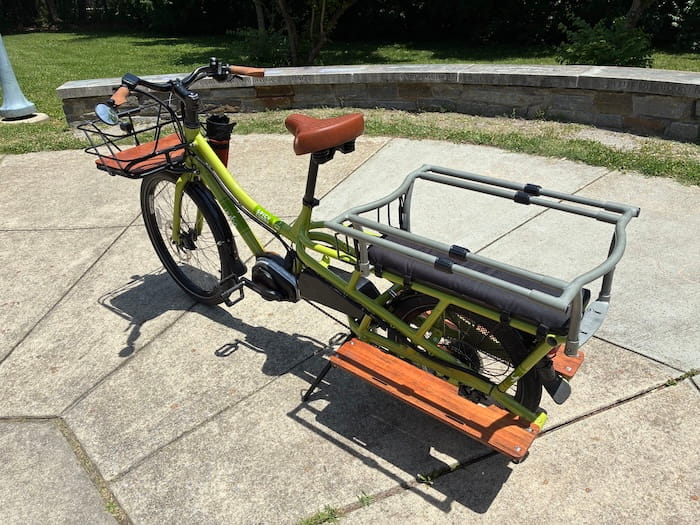
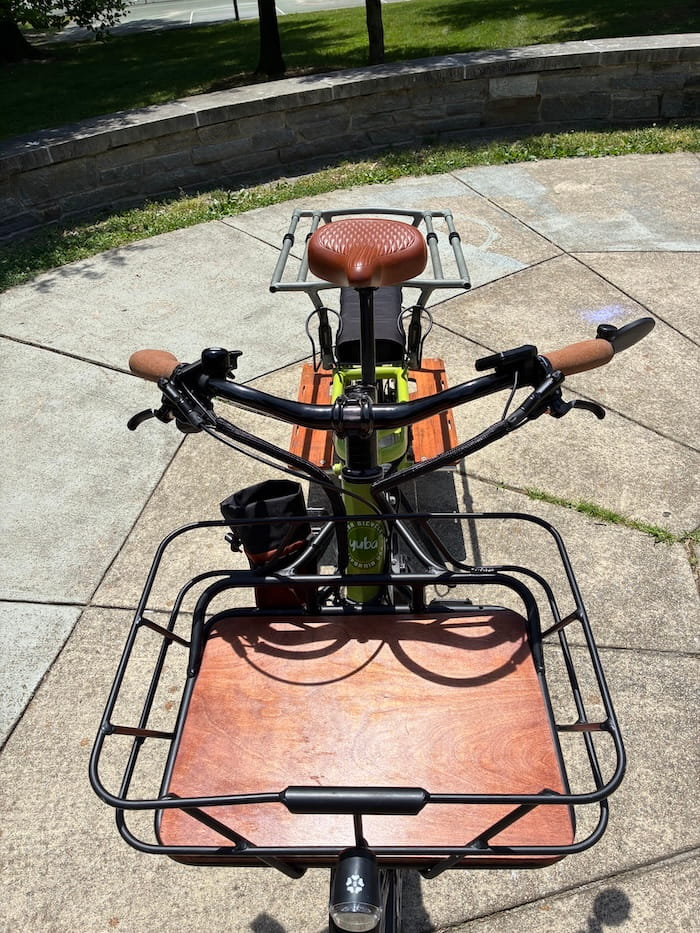
I put a silly very cush seat on it and a nice pair of Ergon Cork Chop Grips and also a bar end mirror over on the left. It took me a lot of trial and error to get the right grip sorted nicely with the throttle. The original throttle I had ordered was really wide and then I realized there are about 5 different throttle options for this kit and found a really skinny thumb one that made more room for the grip, shifter, brake, and bell.
The bike was pretty functional at this point and started its job of hauling my kids to school, soccer, and summer camps. It turned out to be an absolute blast. With just me on the bike it's good for about 30MPH and I'm obviously much more careful on it with the kids, but they really dig it vs sitting in the car and the bike lanes near me are great. I've had a non-powered kid hauler for about 4 years (Xtracycle Edgerunner) so it's nice not getting completely drenched in sweat everytime I drop them off somewhere now. I know there's also a million arguments about e-bikes, but I'll say that this thing feels pretty much like a 50cc scooter with less top end. With the throttle on it, you don't ever have to pedal and it feels more like a gas scooter than a bicycle.
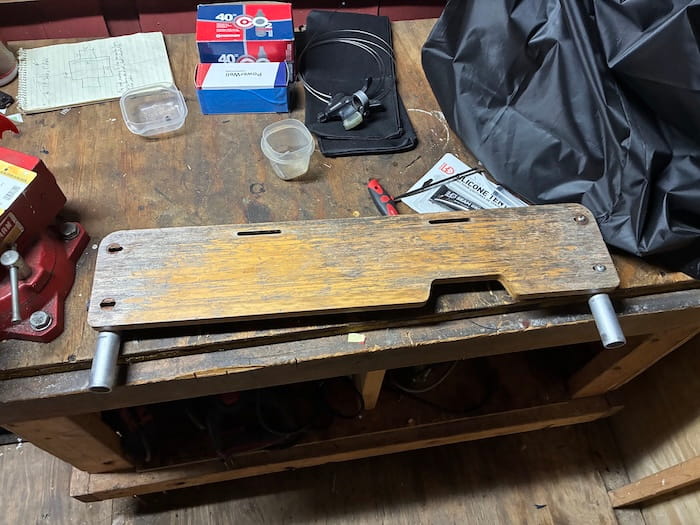
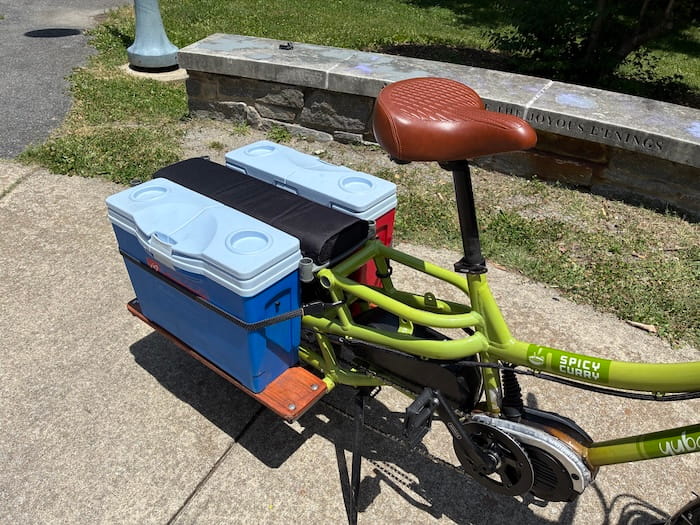
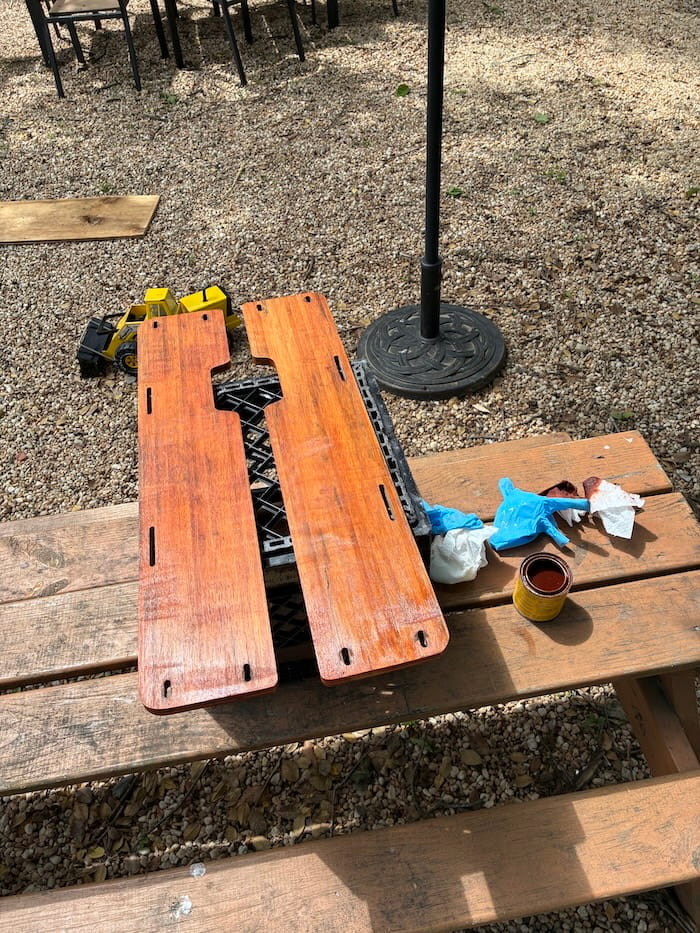
There were a few odds and ends left to sort through at this point. I sanded down the back running boards, stained them, and then did two coats of tung oil and they turned out pretty decent. I ended up going with a much darker stain for the wood because the original boards had deep gray water stains that wouldn't sand out.
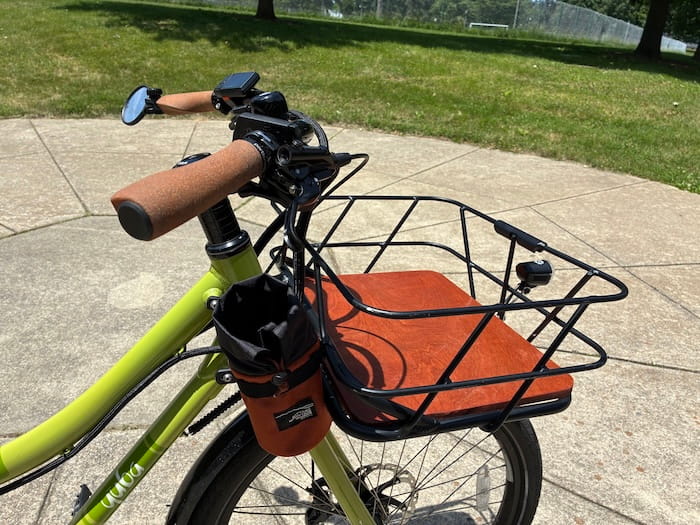
I looked around and also emailed Yuba and couldn't find a new basket liner to replace the tearing one upfront. I eventually just had a woodworker friend cut a new wood bottom for the basket and finished that to match the back floorboards. Things can fall out of the sides of the basket though so you just need to keep them in a bag. This seemed much better than spending $200 on a whole new basket for this thing. I also ordered a nice small bag from Nittany Mountain Works (they were at the Philly Bike Expo) for the front of the bike to keep small stuff like keys, sunscreen, or a phone now that the sides of the basket were more open.
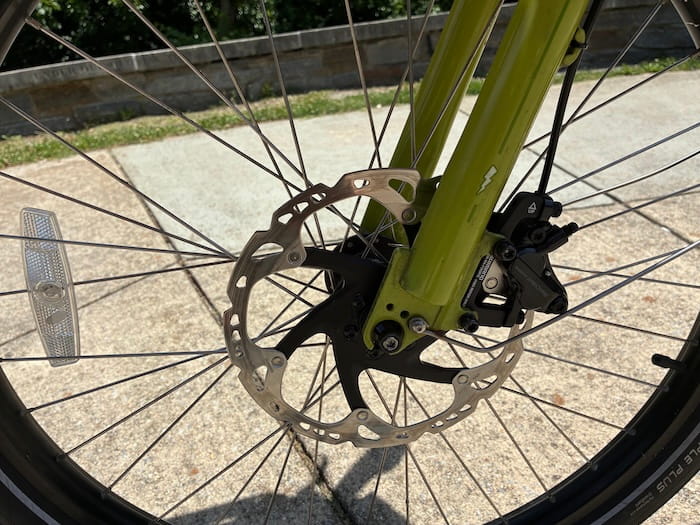
The brakes on the bike were ok... but with all the extra weight and speed I wanted them really dialed in. The bike came with Tektro hydraulic brakes and when I went to bleed them I realized I needed a different size bleed cup, bleed fittings for the calipers, and should have different mineral oil to do it the technically correct way. I decided to just scrap all of that and convert to Shimano 4 piston brakes since they're such a known quantity to me and I have everything to work on them. I picked up Shimano MT520 brakes which I've run before and provide a ton of stopping power for cheap. The bike had a 180mm rotor on the front and a 160mm in back at this point. A friend pointed out that if I was going to go to all this work that I should just get bigger rotors too so I picked up a set of XT 203mm rotors and the adapters to move the calipers out. Installing everything was straightforward other than not initially realizing the adapters to 203mm are different part numbers for the front and back. I also had to slightly shim the back adapter to get the caliper in the correct position over the rotor.
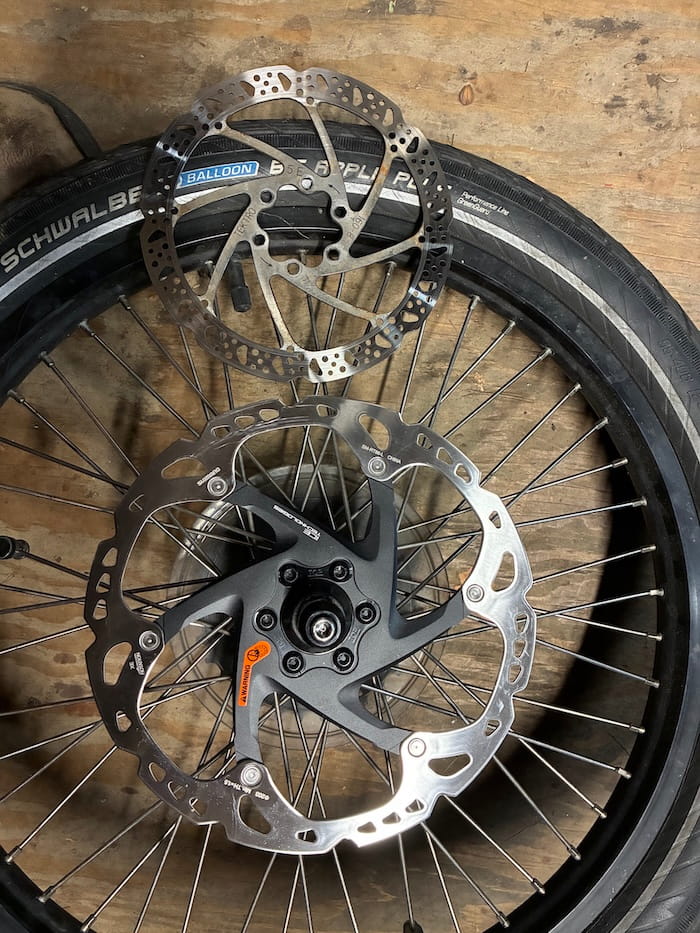
When all was said and done the bike stops extremely well. The back rotor upgrade probably didn't matter that much because even the small rotor was already strong enough to easily to lock up the wheel, but the front is noticably much stronger and especially so on a bike with no suspension. Switching the brakes out was absolutely worth it and the big rotors look nice. I almost went with SRAM Mavens which are supposed to be a crazy amount of stopping power and also would have looked real nice on the bike, but all of my other bikes are running Shimano hydraulic brakes already
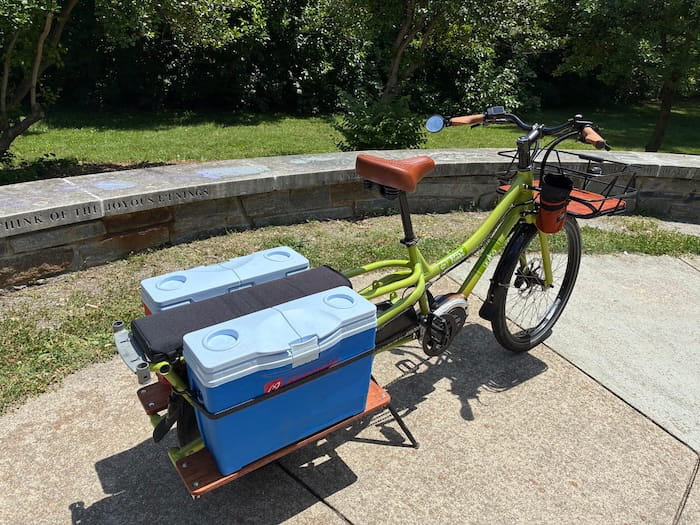
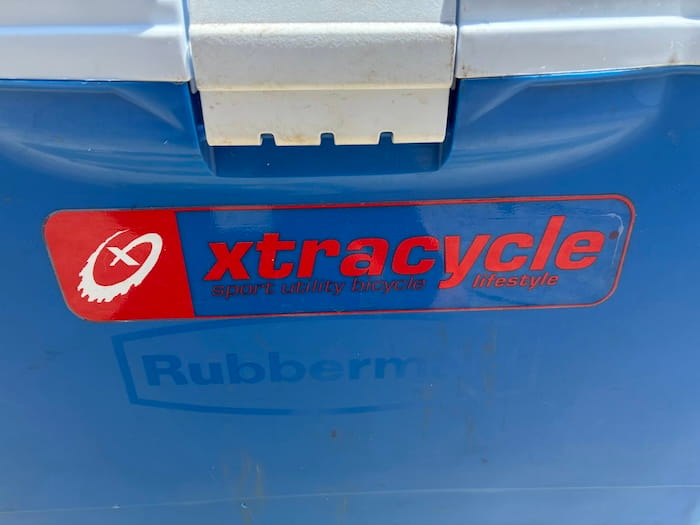
For the final touches I got real lucky that a friend from the dog park mentioned he had a set of coolers that were designed to fit on cargo bikes and I could have them. They look to be some Rubbermaid ones that Xtracycle put their label on and resold. They hysterically say "Sport Utility Bicycle Lifestyle" on the sides. They snug up nicely on the floorboards and I found some bungees that hold them in tight. It'll be a blast to roll around with this thing and cold drinks for friends in the summer.
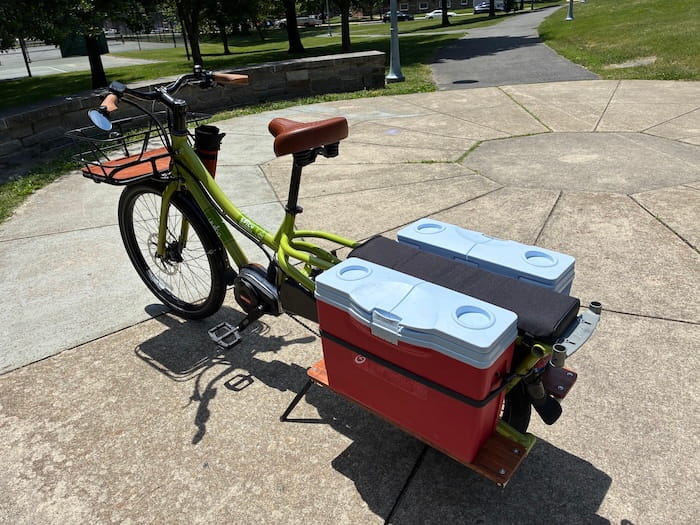
Overall this project went REALLY well. There was a point part way through where I thought maybe I shouldn't have started it (cause I don't really dig e-bikes), but at the end I was really happy with how it turned out and my wife likes riding it too. It's always a nice feeling to save something that was headed for the dump too. A big tupperware fits on the back inside the kid bars for grocery runs and it's definitely cutting down on short car trips. My kids also whine more about anytime we have to take the car somewhere rather than this bike. Before I worked on bicycles, I used to spend a lot of time working on motorcycles and parts of this project felt that same way. For all intents and purposes this thing really is a scooter more than a bicycle when it comes down to it. It goes as fast and takes up as much space. I'm pretty careful to ride it safely and considerately on the bike path compared to some of the wahoos on electric bikes. It's unfortunate that some people ruin e-bikes for everyone else, but for now this thing will be staying in my garage for a while.