Old Radio Rebuild
Radio Shell
I have a 1959 Vintage Zenith Vacuum Tube Radio which I really dig, but it started to get terrible reception and likely needed work. I fix a lot of stuff, but decided I was going to call it on this one and didn't feel like figuring out how to restore a 60 year old radio. I was thinking about gutting the radio and rebuilding it with new electronics in it, but decided it was a little too cool as it was and a friend was interested in rebuilding it properly so I gave it to him.
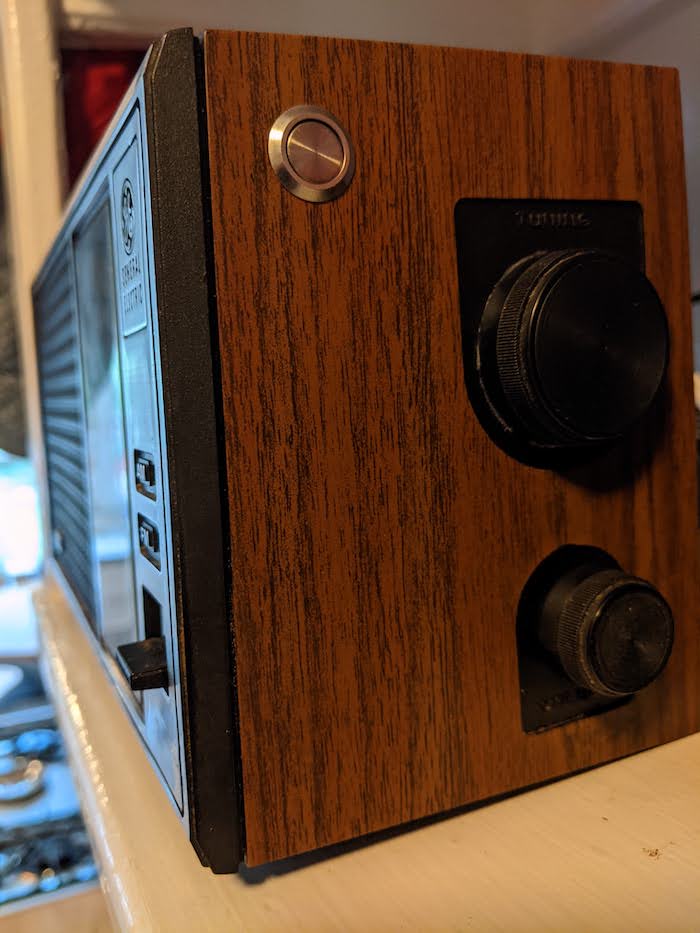
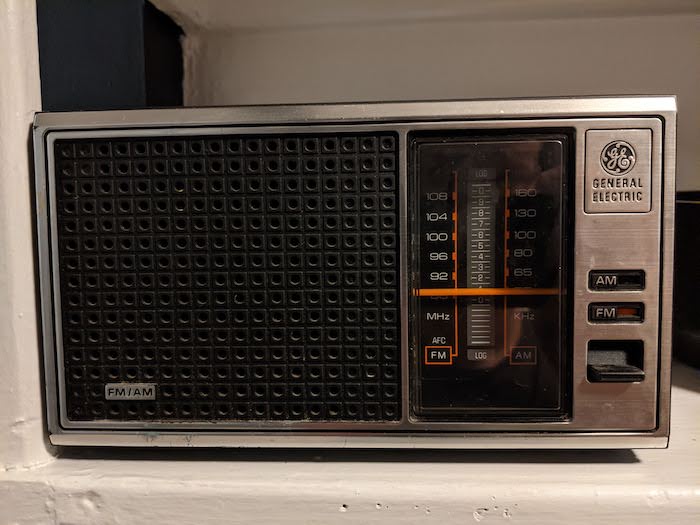
I had already started thinking about how I would rebuild it, done some research, and wanted to, so I ended up looking for a slightly less vintage radio to gut instead. On ebay I found a busted GE 7-4115B from around 1980 which I liked the look of and was cheap. Size wize it seemed big enough to fit the components I'd need to put in it and wasn't too massive for where I wanted it in my kitchen. I pulled everything out of the radio being careful to keep the face of it looking the same and also saved the pieces supporting the volume knob. There are also some prefab raspberry pi projects which let you do streaming, bluetooth, and spotify streaming, but I didn't want all that and wanted it to work exactly how I wanted.
Planning
I wanted something really simple to use. Simple meaning that no phone/computer are required and it works every time. My goals for building it were:- It still looks like a normal old radio.
- No cell phone/bluetooth needed to use it. Just turn it on, and it plays a station.
- Press a button on it to switch to a new station.
- Not great, but decent enough sound quality hopefully using the original speaker.
- Use the original volume knob.
- Easy to turn on and off.
Components
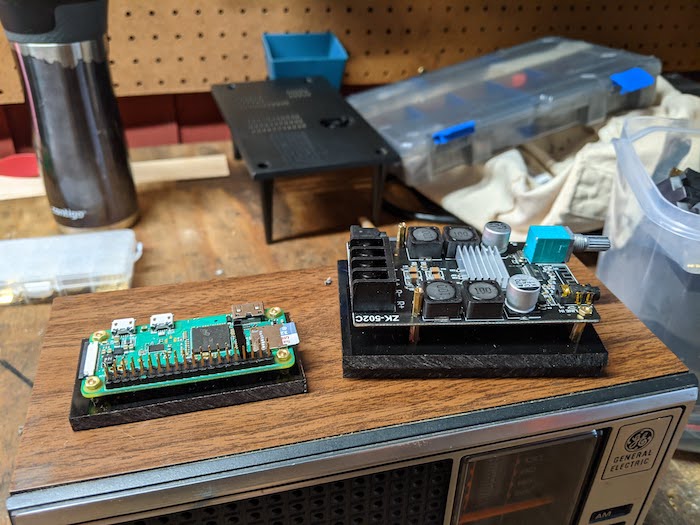
Computer
I'd done some work with a full size raspberry pi on the arcade cabinet and also used a smaller raspberry pi zero for a CUPS print server to convert a normal laser printer to a network printer. All it would really need to do was stream music so it seemed like a pi zero would have plenty of power for that so I ordered one.
Amp
I wanted to try to use the stock speaker in the radio which meant I'd need to connect the two speaker wires to a stereo mini out from the raspberry pi. I looked at some larger amps, and then found this great cheap little one. It also happened to support Bluetooth which I hadn't planned on making work, but seemed like a nice bonus for no effort.
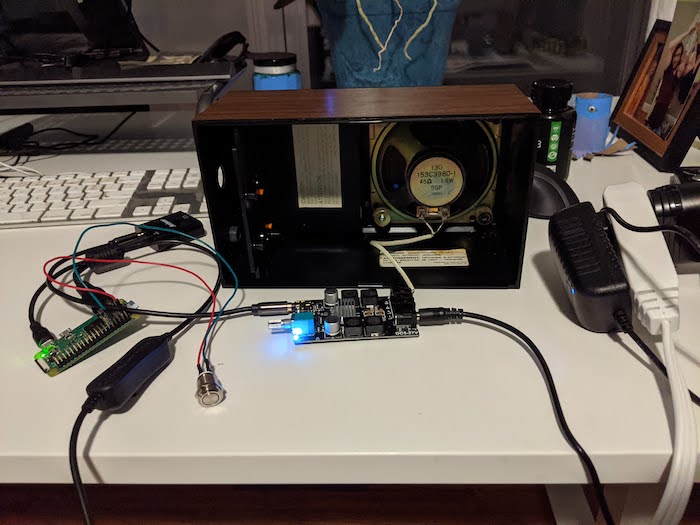
Connecting Everything
I wanted to get everything working outside of the radio first obviously before I crammed it all in there. Luckily everything worked as expected and I had sound from the pi playing through the radio speaker without too many hassles.
- I flashed raspbian to a micro SD card, booted up the pi, plugged some headphones into it and made sure it was sending audio out.
- The pi zero has HDMI mini out for audio, so this converter was necessary to switch it to stereo mini out which the amp would need.
- A standard 1 ft stereo mini cable to connect the HDMI converter to the amp.
- The pi outputs 2 channel stereo and the amp is designed to be wired to two speakers, but the radio only has one speaker. This converter changes the signal from stereo to mono so we get everything we should over the one speaker rather than just half of the audio.
- The amp is wired to the two stock speaker wires on the one speaker in the radio shell.
- The pi and the amp both take standard power adapters.
- The pi and amp just run power cords to a small power strip that sits in back. To turn everything on/off you just flip the single switch on the power strip.
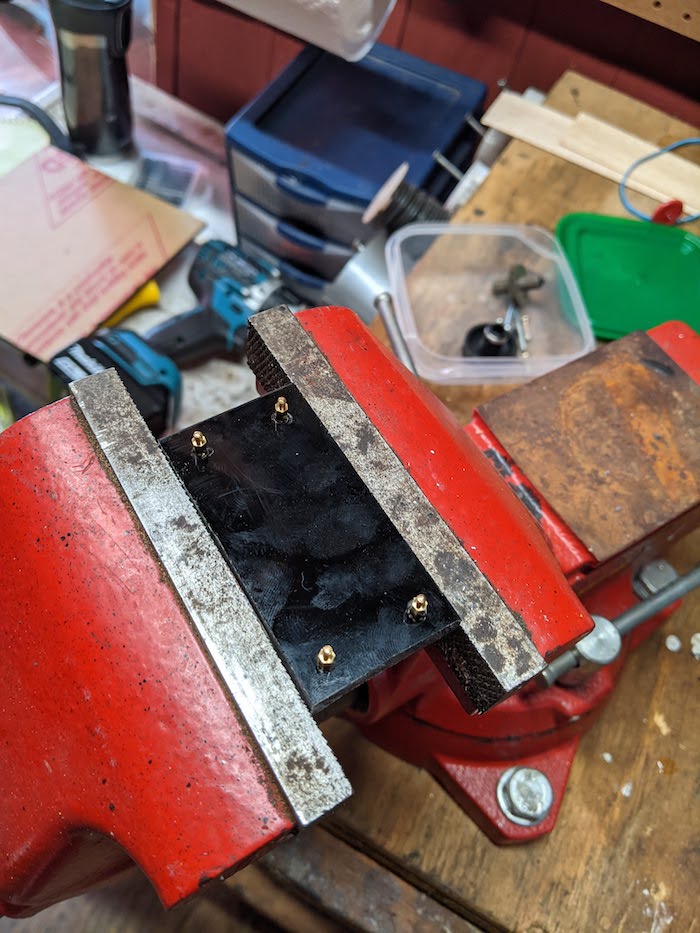
- I had some pieces of acrylic laying around so I cut and drilled them and used small brass standoffs to connect the pi and amp boards to.
- Very luckily the original volume knob on the radio slid right into the knob mount on the amp once the amp was glued down in the right place.
Programming the Raspberry Pi
There are two scripts running on the Raspberry Pi and a single file used to track which stream was played last. All of these files live at /home/pi/radio/ and you can check them out here on github. The two scripts are run on startup by placing the following entries in /etc/rc.local
/etc/rc.local
/home/pi/radio/play.sh
python3 /home/pi/radio/button.py
/home/pi/radio/play.sh
Source at: https://github.com/mtoigo/pi-radio/blob/main/play.sh
The first is a script to play a streaming station. It reads from an array of streaming URLs, uses a local file (current_stream) to track which one was last played, kills any existing versions of the player, plays the next stream, and then writes back to the local file to track the new station is being played. This is used to play music on startup and anytime it is called again it will play the next station.
/home/pi/radio/button.sh
Source at: https://github.com/mtoigo/pi-radio/blob/main/button.py
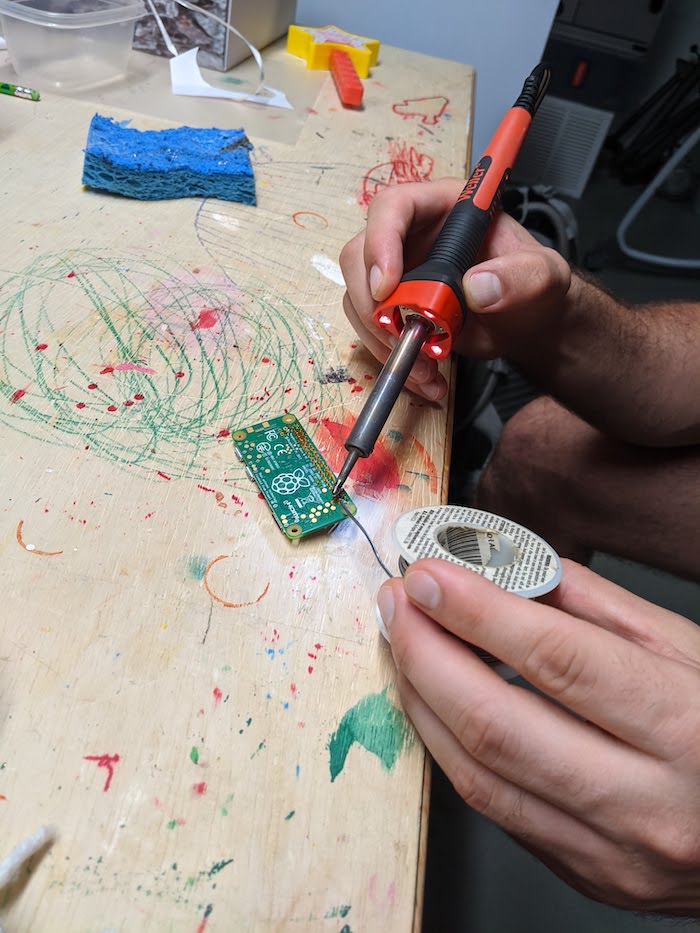
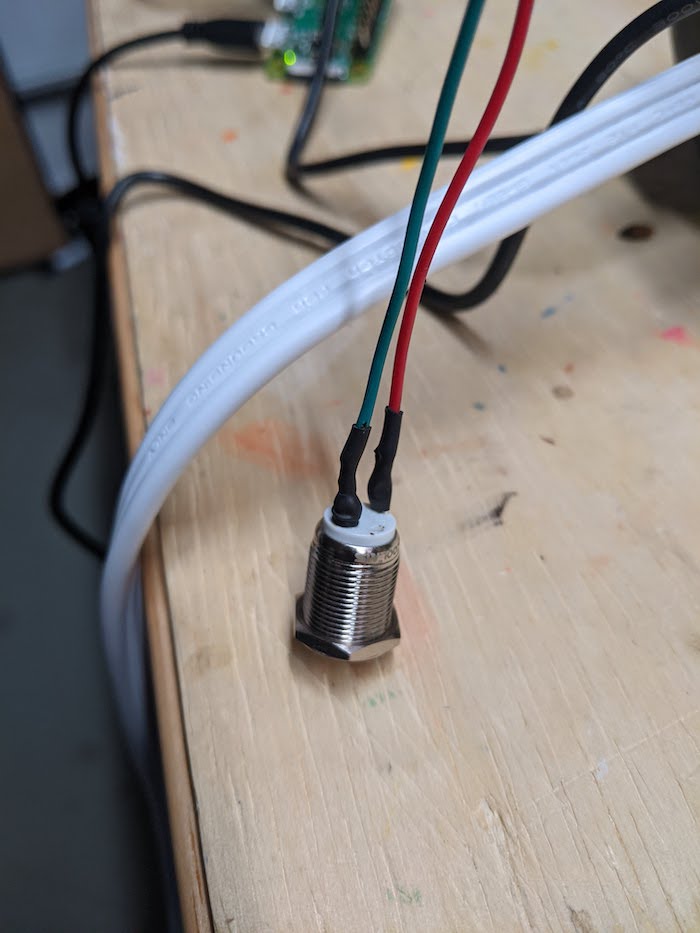
The second script is used to wait for a button press and then run play.sh to switch to the next station. I set this up using this tutorial which I used previously to setup a shutdown switch on my arcade cabinet. I drilled a hole in the side of the radio and then used this button and connected it to the GPIO pins on the pi. I called a friend who's much better at small electronics (and had all the supplies) than I am so he helped solder the pins onto the pi, solder some of the button connections, and tidied it up nicely with some heatshrink.
/home/pi/radio/current_stream
You'll need to create a file at /home/pi/radio/current_stream with just the character 0 in it and make sure the file is writable using chmod.
Remote
One of the entire points of building the radio the way I did was that I wanted it to work without a cell phone, but after setting it up I would be sitting down eating breakfast and want to change the station, but didn't feel like geting up to press the button. I happen to get really lucky and there's an easy solution without much work. If you buy the pro version of the mobile SSH client Juice for Android, it has support for a feature called snippets. Assuming you configured the pi with a reserved IP on your router, you can save the connection details in Juice and then automatically run a snippet whenever you connect. I setup the snippet /home/pi/radio/play.sh && exit and then it lets you add a shortcut to your homescreen. The end result is a single icon on my phone homescreen that I can tap to change the station.
Finishing Up
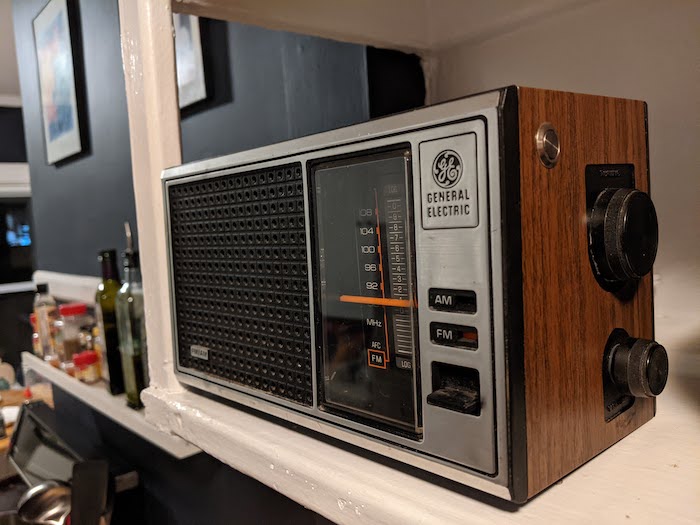
Overall everything turned out great. I like how the old radio looks sitting on a shelf in my also old looking kitchen. I flip a switch to turn it on in the mornings without having to mess with bluetooth on my phone and can easily change stations. It takes about 45 seconds to boot up and only takes about 2 seconds for a station to switch after pressing the button or icon on my phone homescreen. This setup is nice because it will also work perfectly for any old radio or stereo/speaker cabinet. The following things maybe could have been a little better, but I can live with them.
- The amp that I used to connect the stock speaker to stereo mini supported bluetooth which I never planned on, but does let you connect a phone via bluetooth to play music. This wasn't at all originally in the plans, but does work. There are two problems with this though. The converter I have in there to switch stereo to mono is before the amp so you get both channels from the pi properly. For bluetooth though, it doesn't sound as good since you're only getting one channel since there's not a converter between the amp and the speaker. It's livable, but songs honestly don't sound as good. The second problem is the way the amp works is that if a device is connected via bluetooth, it takes priority over the signal coming in from the stereo mini jack. This works great with one phone because you just turn bluetooth on/off depending on if you want the radio stations or bluetooth. A big problem though is you have two phones connecting to bluetooth, you need to turn them both off to get the streaming stations back. My wife would be upstairs and still connected to bluetooth and I'd have to get her to turn it off to get the stations back. Given both of these we just use a normal bluetooth speaker for playing spotify and don't bother.
- Ocassionally I was getting really choppy audio output and wasn't sure why. After some digging it was due to a bad wifi signal. I ended up leaving the back of the radio off which improved the wifi signal and resolved the issue. It sits on a shelf where you can't see that the back is open so it doesn't really matter.
- There isn't any kind of safe shutdown built in. This is the equivalent of just turning off the power to a laptop without choosing shutdown first. There are some ways I can fix this, but I just backed up the memory card and if it gets corrupted I'll restore it. I've been shutting it off this way for a few months without issue and there's no data I'd risk losing on the pi so it seems fine.
- Originally I wanted to place the power strip and related adapters for the pi and amp inside the radio and then place a power switch on the back of it the same way I did with the arcade cabinet. I probably could have done this with the radio, but everything would have been crammed tightly in the space and I worried about components overheating or interference with the signal on the audio cables. I just flip the switch on the power strip to turn everything on or off. It's not as slick as a switch on the back of the radio, but I can live with it. If I built all of this into a larger radio/cabinet this would be the way to go.