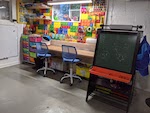
Craftstation 5000
I had just finished a bunch of more mundane house projects including 6 rounds of sanding uneven drywall seams until near death, so I needed to work on something more fun. This was previously a nasty corner of the basement with raw block walls and missing drywall. It seemed perfect for a craft/workbench/art space for my son. Here's all the details.
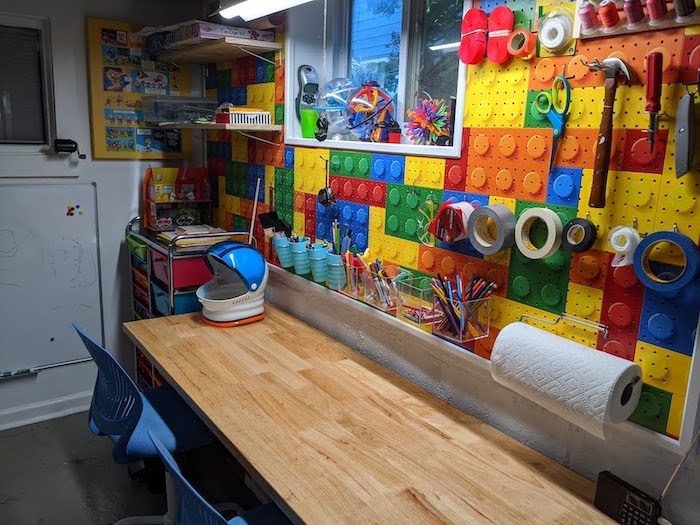
Build Details
- Patched up any small holes in the block walls with hydraulic cement and then two thick coats of BEHR DryPlus paint.
- Built the frame out of 1 x 3 Furring Strip, pre drilled the wood and block with a fresh masonry bit and hammer drill. Screwed the frame to the wall with Tapcon screws making sure to sync them flush into the wood frame.
- Cut a piece of white pegboard the approximate size of the wood frame, but slightly bigger so it hung off the sides off the frame. Drilled new holes in the pegboard between the normal holes every 1" and made sure to drill the pegboard slightly so 1/2" screws would sit flush into the face of the pegboard to hold it to the frame.
- Used a circular saw and reciprocating saw to cut the extra pegboard off all the edges so it was flush with the sides of the frame
- Lightly sanded the pegboard since it was glossy and I wanted wallpaper to stick to it better.
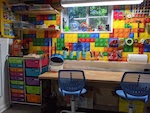
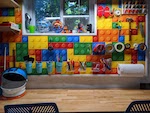
- Bought this fancy lego wallpaper. This is higher end wallpaper so you don't need to do the putting glue on it for a bit for it to shrink + contract before you place it on the wall process like you do with some wallpaper. It's called paste the wall paper and like the name suggests you can just coat the wall in normal wallpaper wall size and then lay the paper on the wall right away. It's pricier, but worth it if you've never hung wallpaper before.
- Painted Zinsser Wall Size on the pegboard before laying each piece of wallpaper. Give it 10 minutes to ooze out of the pegboard holes and then wipe down any drips. If you don't do this you'll get wrinkles in the wallpaper as the glue oozes out behind it.
- Lay the sheets of paper carefully and use a piece of plastic with a long flat edge to carefully smooth out any bubbles. They make a wallpaper plastic knife just for this which is cheap and worth it. It's also worth using a seam roller to smooth out the places where the seams meet.
- Get a sheetrock knife with a fresh blade in it and cut any extra wallpaper off the edges of the pegboard.
- Carefully look over the whole thing to smooth out any bubbles.
- Paint the corner trim the color you want it before you attach it to the edges of the pegboard.
- When it's dry you can cut out the corner trim for the entire thing to cover up the rough edges. This is a trickier part and you absolutely need a mitre saw to do a good job on it and get the seams on the corners to meet nicely. Always cut a little long and then trim down 1mm at a time until you get a tight joint.
- You can use 1" finish nails to attach the trim to the wood frame from the sides so you don't see any nails when looking at the finished product from the front. If you do need to nail from the front (like when the top of the pegboard is near the ceiling), sink the nails slightly with a nailset and then use painters caulk to fill in the holes and you can also caulk the mitred corner joints as well too and them some touch up paint if you ended up with any gaps.
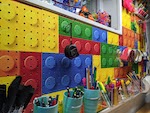
- The silliest and final step is to punch out all of the holes in the pegboard through the wallpaper. Use an awl for the initial hole and then try to find a screwdriver that's close to the size of the holes in the pegboard. This obviously takes forever so just do bits at a time with the radio on and a beer in hand.
- I also cut a piece of 1/4" plywood the exact size as the top of the workbench. This is nice to place ontop if you're doing anything really messy like painting or if you're cutting anything so you don't damage the face of the workbench. It just sits behind the workbench when I don't need it.
Sign
I had my talented sister design a sign to put up (during Covid... I was bored) and she came up with this perfect logo which I had printed on aluminum with an acrylic backing via Plaquemaker

Stuff
- I spent some cash on a nice adjustable height workbench which goes down to kid height which was worth it. I could have built something, but it was worth buying something in this case to get the height adjust and it works great. It's a Husky Adjustable Height 72" Work Table.
- The chairs are kid size drafting chairs, but sturdy enough to sit on for an adult. They're Greenforest Desk Chairs for Kids.
- There's kits that have all kinds of hooks/shelves for pegboard and the cups/boxes for pens/pencils/markers/brushes are here and here. A paper towel holder is also worth it.
- Hanging a 4ft LED shop light above makes working on anything easier.
- This organizer came in handy for all the art supplies.
