Arcade Cabinet Rebuild
Getting the Cabinets
In my office building there were 2 unused arcade cabinets just sitting around that never worked. When I heard they were going to close off the floor they were on, I asked about them and heard they were headed for the dumpster so I jumped at the chance to get both of them. I had no clue what work they would need, but the cabinets themselves looked to be really well built so it seemed worth fixing them up.
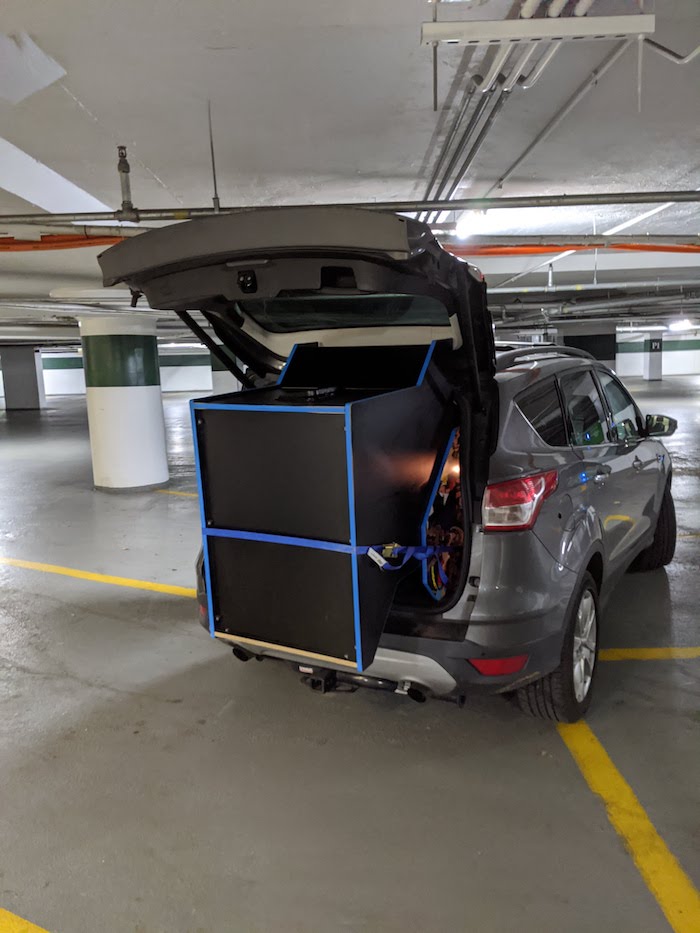
Getting both of them out of the building was the first task, and even with a handtruck and a friend helping it wasn't easy. We got one out in one piece and split the second one into the top and bottom pieces. Neither approach worked too well and we ended up taking 3 trips with my Ford Escape to get them both back to my garage. Between the CRT monitor and all the particle board, they're probably at least 200lbs a piece.
Fixing the Monitor
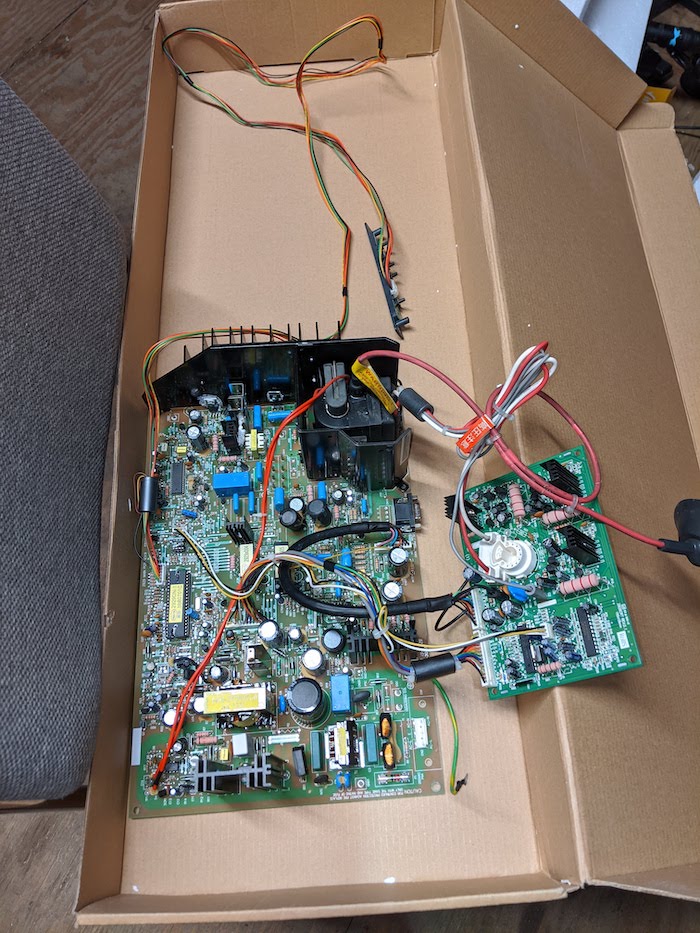
I knew the computers in them were shot, but also the easiest to fix by just swapping in a Raspberry Pi, so I decided to tackle the likely most difficult part first which was the CRT. I briefly debated swapping in a new LCD, but it didn't look like they actually make LCDs in this size/aspect ratio and if you want true retro/nostalgia fun than fixing the CRT is the way to go. I did some basic troubleshooting on the CRT and couldn't get it working. From reading up on old CRTs, it's very common for the capacitors to go bad which means you're pulling the old ones off the boards and soldering on new ones.
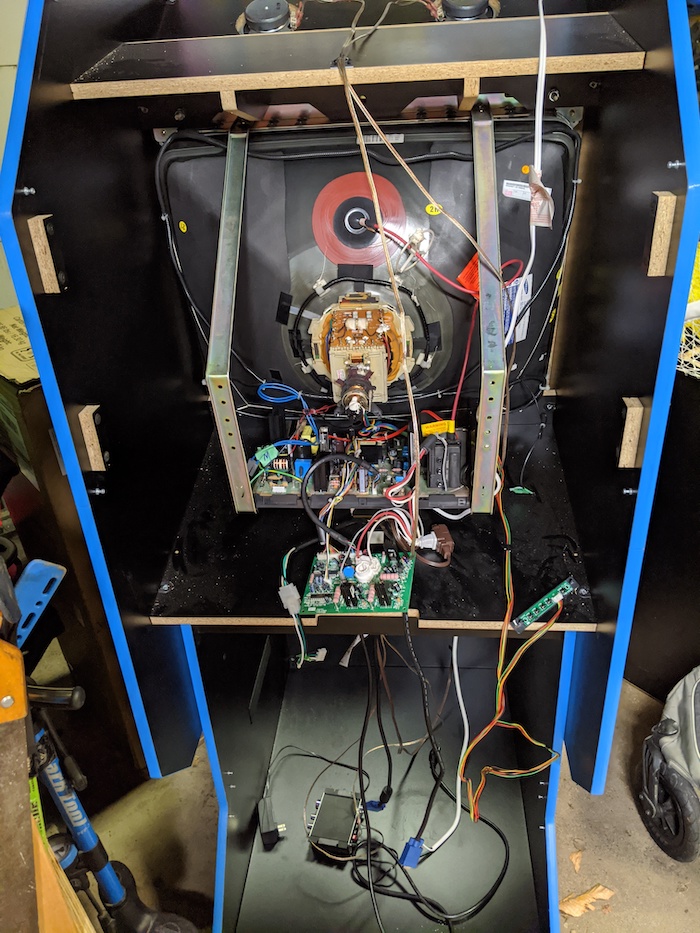
I'm pretty good at fixing things, but even I know my limits and there's actually a pretty limited supply of these particular monitors around so I didn't want to risk destroying one. I ended up pulling the two boards out of the CRT and shipping them to Chad at www.arcadecup.com for repair. Judging from the long parts list of what he replaced this was absolutely the right move. About 6 weeks later I had the boards back in the monitor and it worked perfectly. I bought a VGA to micro HDMI converter to hook the monitor up to the Raspberry Pi. ABSOLUTELY READ UP ON HOW TO DISCHARGE A CRT BECAUSE THEY CAN SHOCK YOU EVEN WHEN THEY'RE NOT PLUGGED IN.
Joysticks and Buttons
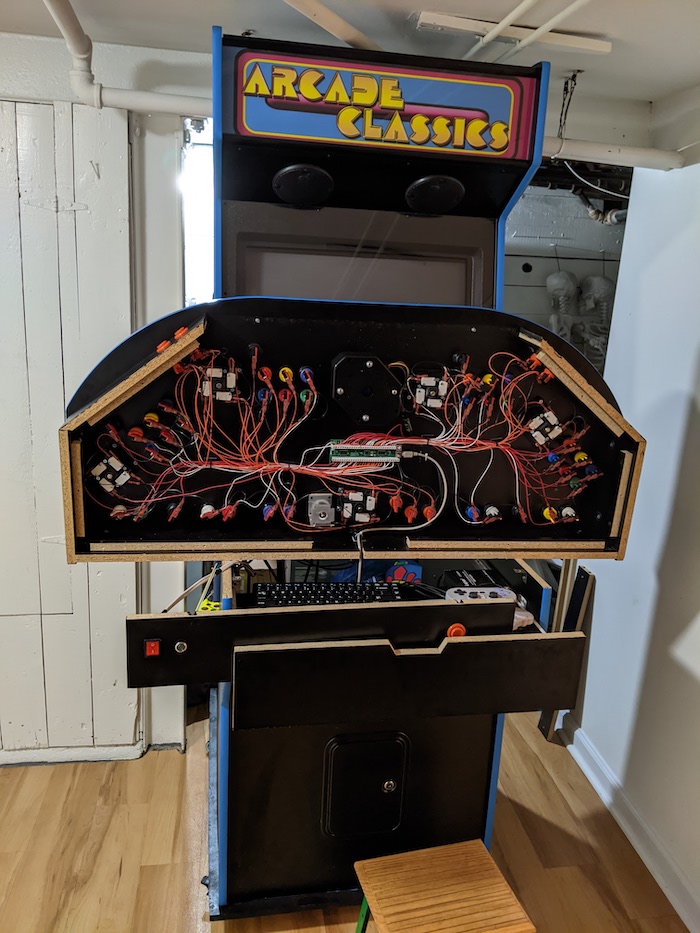
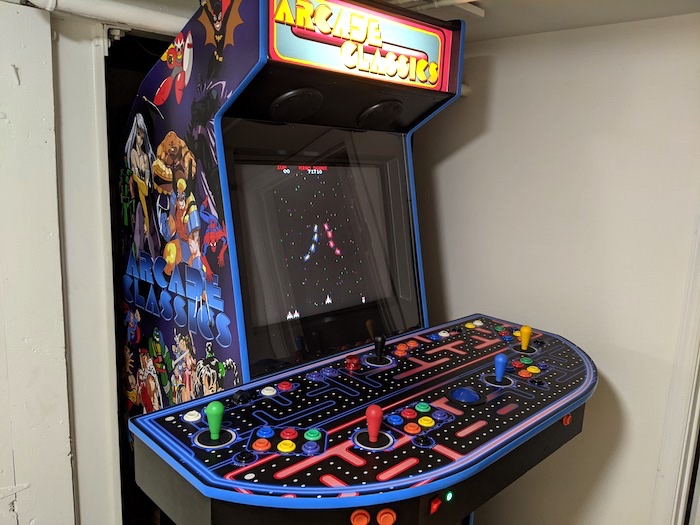
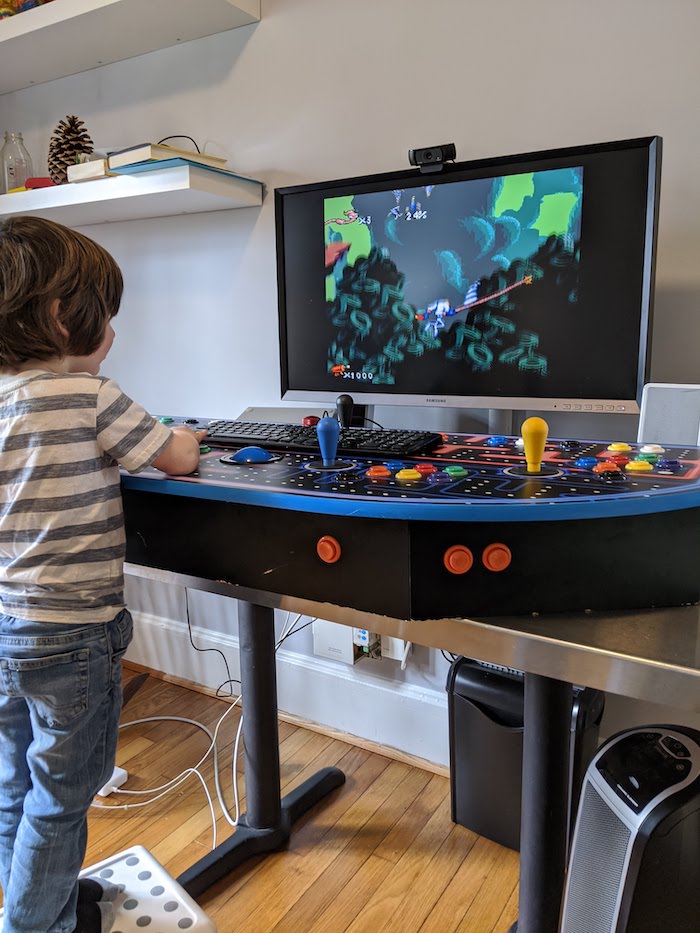
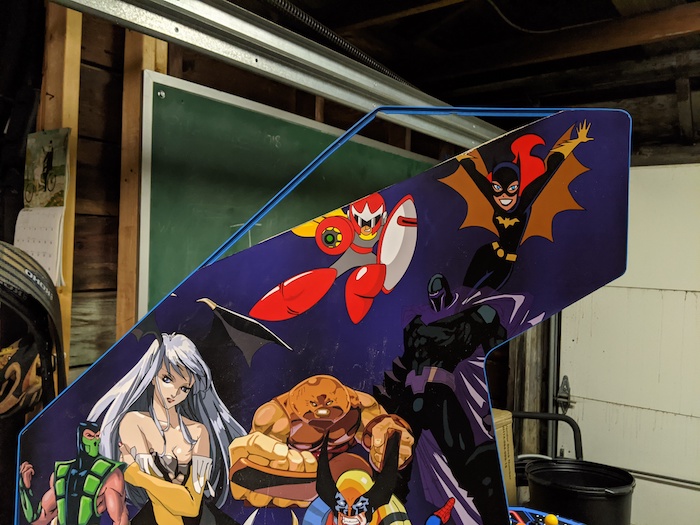
The cabinet had a 4 player setup which is ideal if you're looking to play classic 4 player arcade games like Simpsons or X-Men. I started to pull apart this part of the cabinet and everything looked to be in really good shape. All of the buttons are wired into an Ultimarc IPAC 4 board which takes all of the button/joystick presses and then converts them to keyboard presses so the joysticks actually just appear as a keyboard to a computer.

The Ultimarc IPAC was a really old one and actually had PS2 (the purple circle keyboard port on the back of your Compaq Presario in highschool) out rather than USB. I used a PS2 to USB converter to hook it up to the Raspberry Pi. I burned WAAAAAYYYYY too much time getting this to work properly and also reprogramming the keystrokes coming from the Ultimarc. There's also a bunch of keys that conflict with default hot keys in MAME which I had to disable. In hindsight I should have just bought a new Ultimarc IPAC with USB out, but I would have had to reconnect about 50 wires to it which seems like a lot of work, but would have been much less than all the debugging/fixing I had to do. This part of the cabinet took so much work I actually just placed the entire joystick/button setup on my desk where it was easier to work on. I also added a piece of metal over the exit game button so kids don't accidentally hit it when you're just about to finally beat a game.
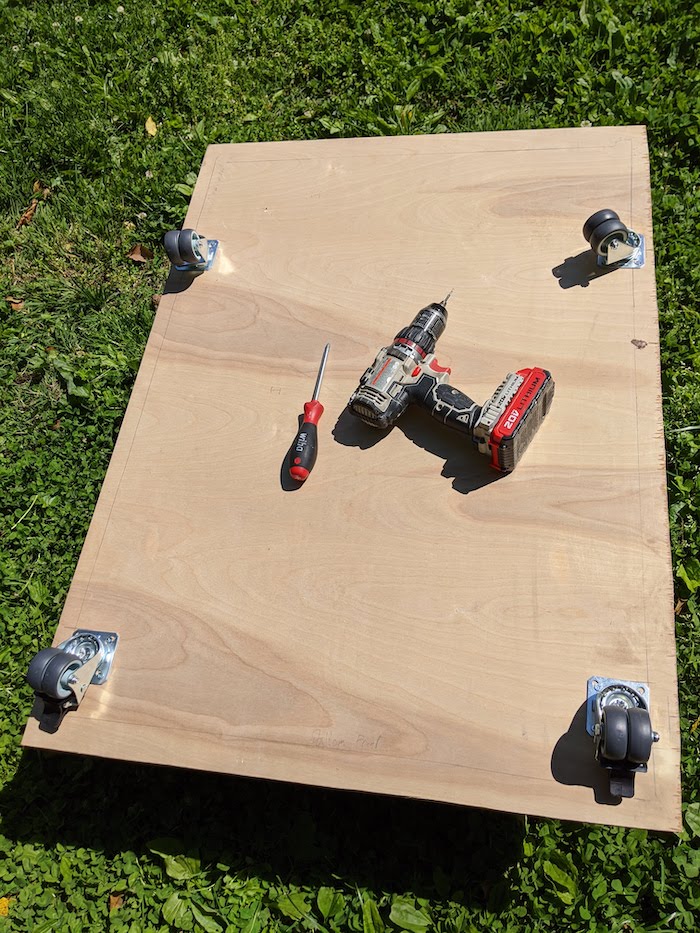
Wheels
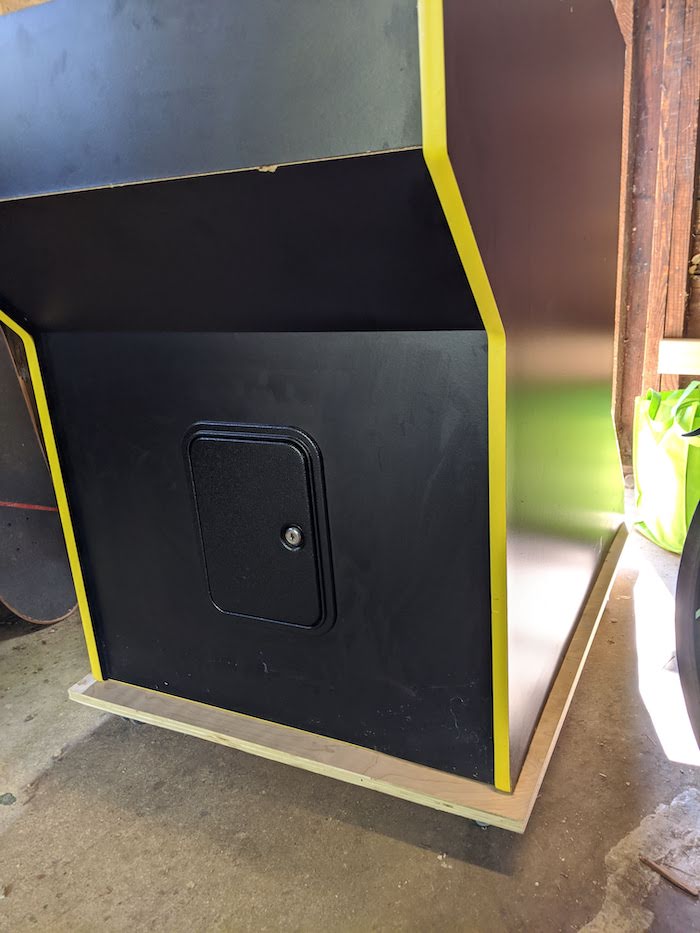
Given how heavy this thing is, I wanted it on casters incase I ever had to move it. In my basement I actually have it infront of a storage area that I need access to, so I move it pretty frequently. It was worth buying locking casters since people get real into playing and push the cabinet around. Make sure to get something beefy because of how much the entire setup weighs. I just used a piece of cabinet plywood slightly larger than the base to screw the casters to and then screwed down through the bottom of the cabinet to attach it to the plywood. This raised the controls by about 3" and I debated cutting off the bottom of the cabinet to even this out, but it didn't seem worth it.
Cutting the Cabinet
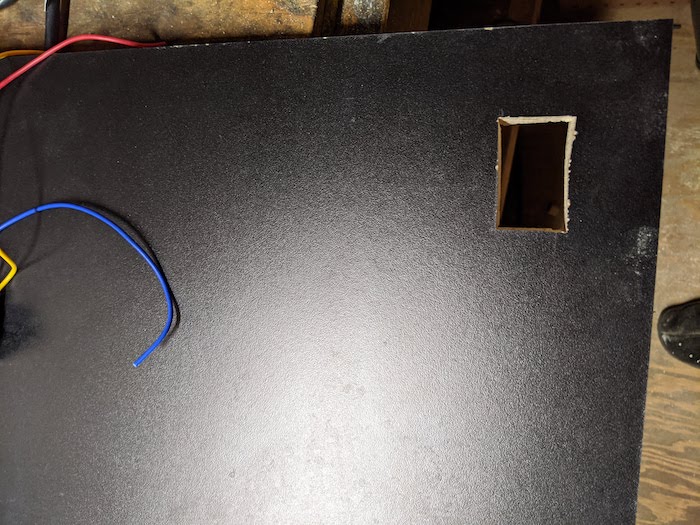
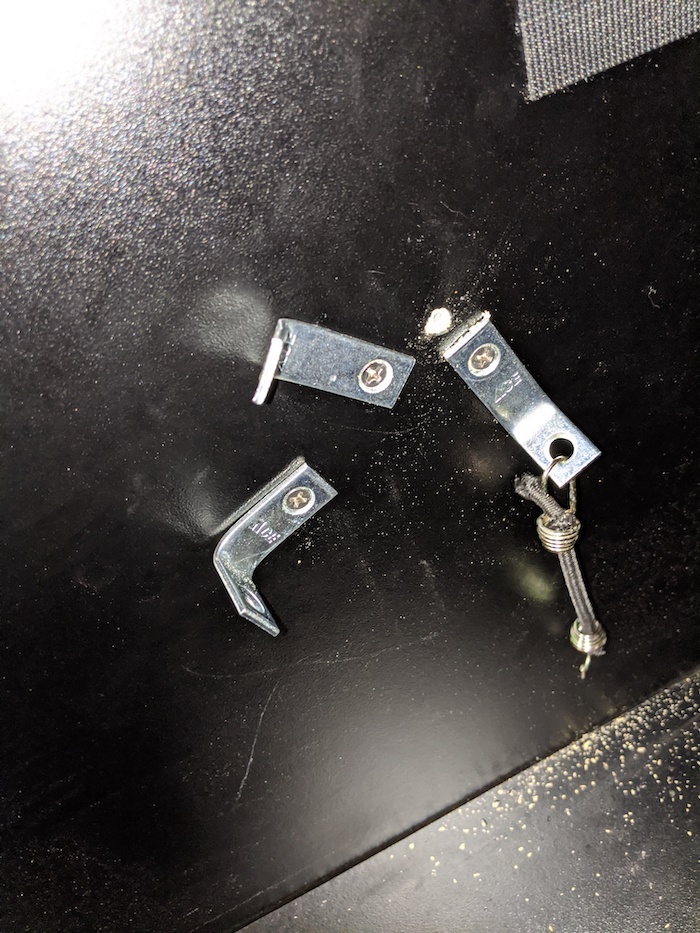
My basement has pretty low ceilings and also has radiator piping below the joists which makes for not a lot of room vertically. I actually ended up lopping off part of the top cabinet pieces to make it fit and then cutting a groove to seat the plastic trim in the new edge. I also attached some small brackets inside the cabinet to mount the Raspberry Pi and also clips to tidy up the cable routhing as well.
Power Wiring
In a stock Raspberry Pi there isn't a simple way to power them up and down. The arcade cabinet is interesting too because you actually want to flip power to 3 things at once (CRT, Raspberry Pi, and Amplifier). There are some easy ways around this like running everything in the cabinet to a power supply outside and then flipping the switch on the power supply, but I wanted something much cleaner and easier to use.
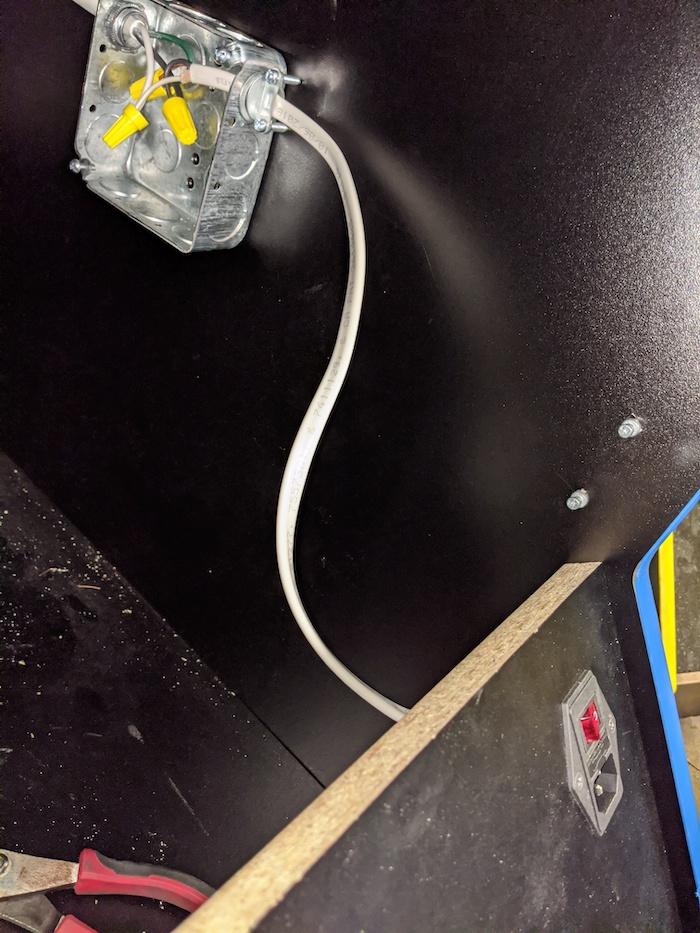
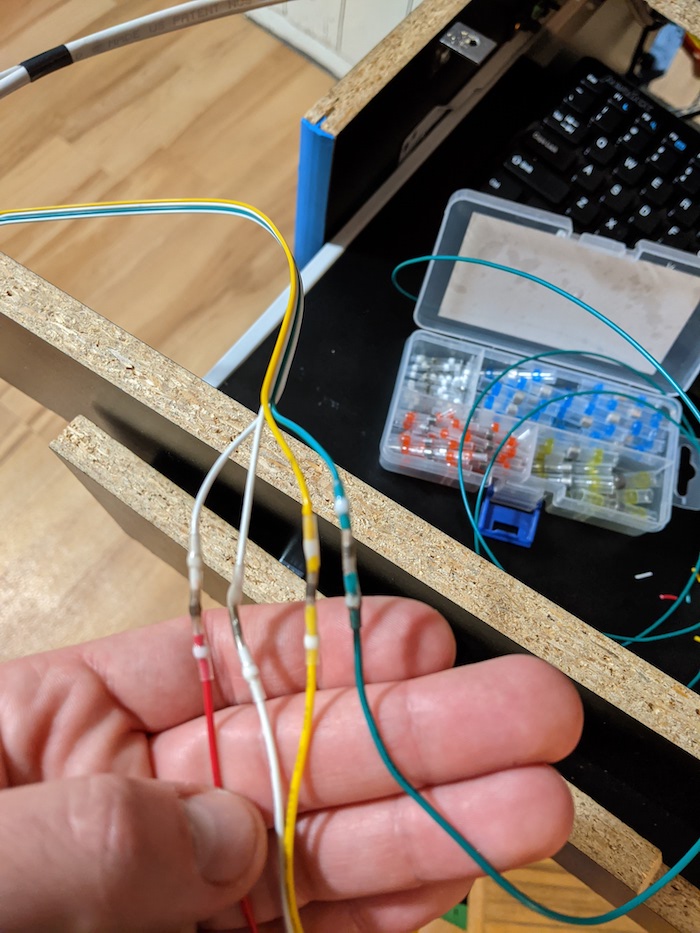
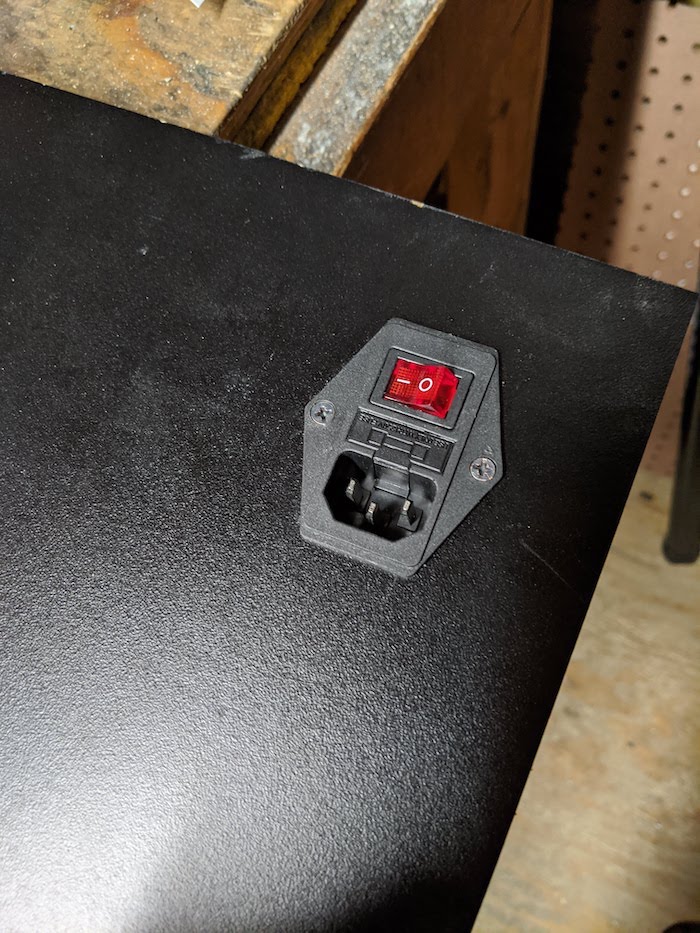 To start I added a switch/fuse unit on the back which I wanted for two reasons. The first is it has a C14 power connector on it which makes it easier to swap a longer power cord to the back of the cabinet without using extension cords. Second, it contains a 5 amp fuse and given how valuable the monitors are I wanted to make sure they were safe from power surges. A lot of the wiring inside also becomes easier if you know there can never be more than 5 amps of current anywhere inside the cabinet. I attached normal 14 guage/15 amp home wire to the switch/fuse and then ran that into an electrical box I mounted inside the cabinet.
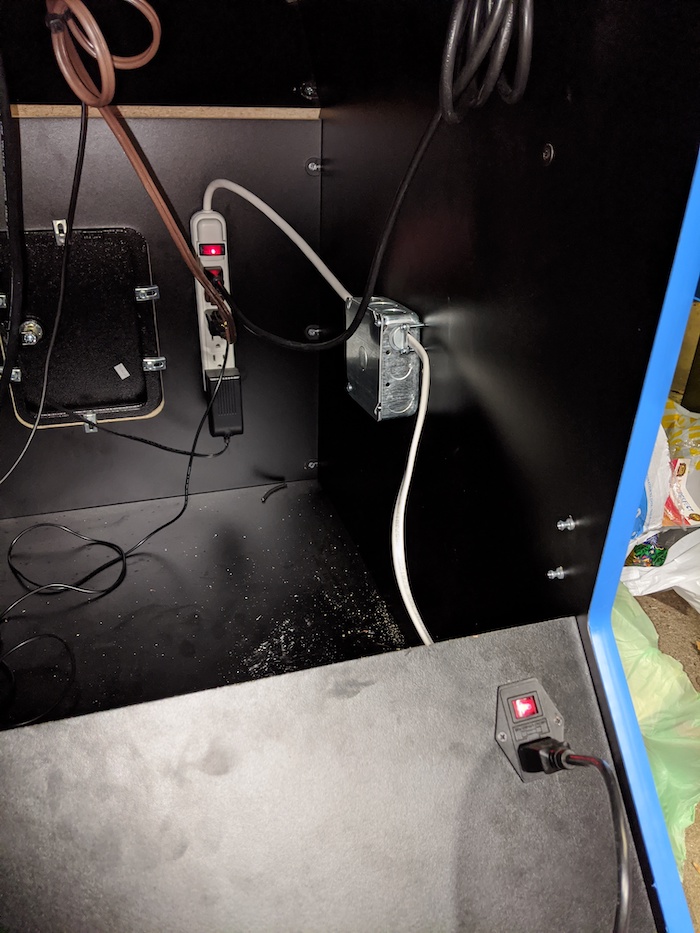
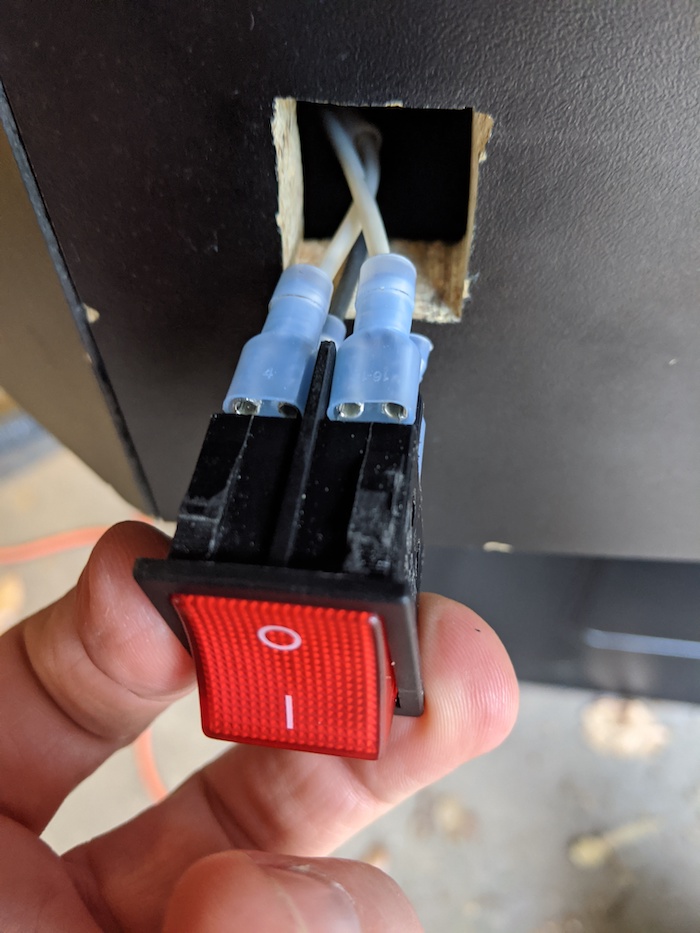
I mounted a power strip inside the cabinet with the CRT, Raspberry Pi, top light, and Amplifier plugged into it. I cut the plug off the powerstrip and ran the wires to the electrical box. This setup would have been fine if I was ok walking to the back of the cabinet to turn it on, but I wanted to be able to turn the whole setup on from the front of the cabinet. I ran wiring up to an appliance rocker switch that I mounted in the front as well as an additional neutral cable to make the appliance switch LCD work properly. At this point you can walk up to the cabinet and flip it on and everything will power up. When you're done you can also flip the switch to turn everything off, but you have to exit the game you're in and then go through a few safe shutdown menus to get the Raspberry Pi to shutdown safely. This was a little cumbersome and something my son didn't know how to do. If you don't safely shut down, you can risk corrupting the SD card in the Raspberry Pi.
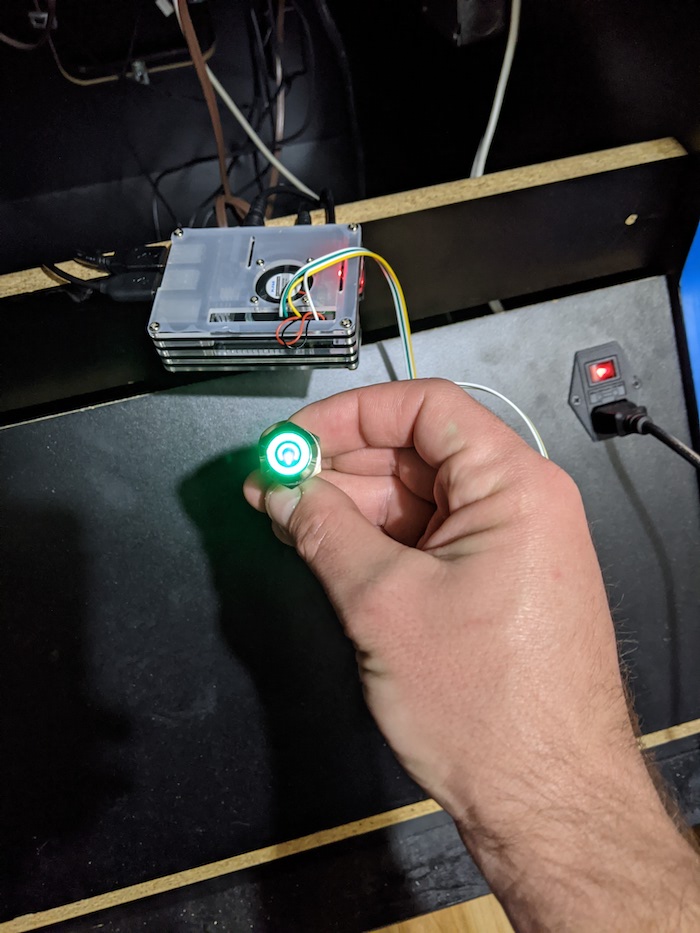
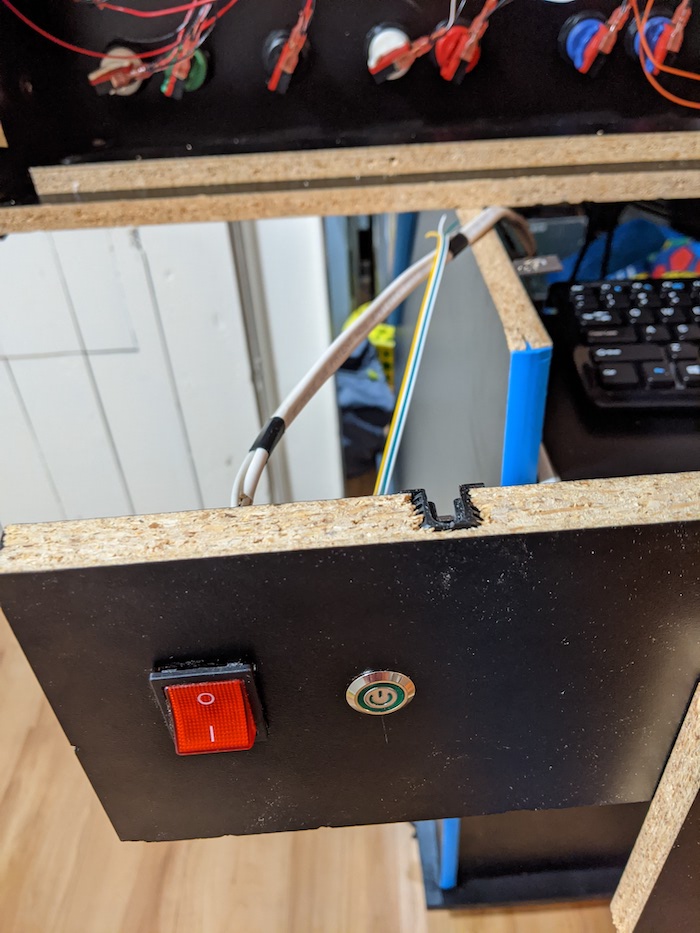
Shutdown Command Switch
The last piece was having a single button you could press to issue a shutdown command to the Raspberry Pi. I ordered one of these switches, extended the cables with 24AWG wiring and butt connectors and then connected it to the pins on the Raspberry Pi and followed this tutorial. The result is that you can press this button in for 2 seconds to trigger the Raspberry Pi to safely shutdown and then you can flip the appliance switch to turn everything off.
Raspberry Pi
This is a pretty straightforward Raspberry Pi 4B with a 512GB SD card in it. I went with such a large card because I wanted Nintendo 64 games on it and also possibly Playstation games which eat up a lot of space. In hindsight, dealing with SD cards this big is kind of a pain because they take about 12 hours to image or to clone to a new card. It may have been better to just run a solid state drive attached to the PI with a smaller SD card in it. The software that makes this all work is RetroPie which I don't want to go into because there's tons of resources online about. I also used this case with an additional fan because I was worried about a lack of good air circulation inside the arcade cabinet.

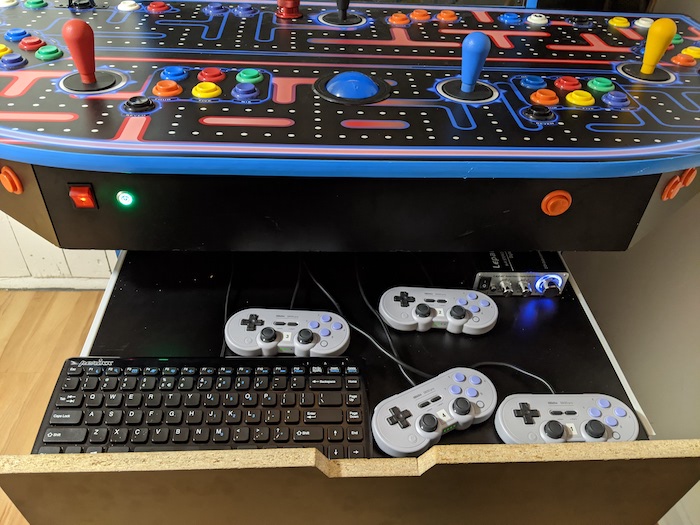
Controllers/Keyboard/Amplifier/Light
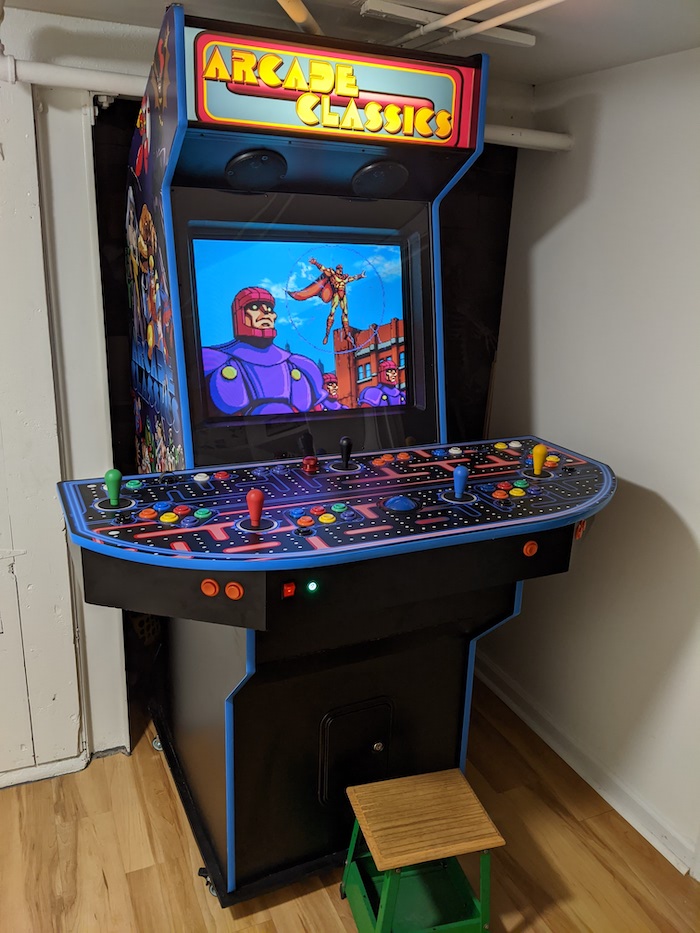
I also setup the Raspberry Pi to play NES, SNES, Sega, and N64 games, but the arcade buttons/joystick aren't the best setup for those. I bought 4 8bitdo wired controllers and have those all configured for playing games on those systems. The cabinet also has a nice drawer to keep these controllers in as well as a small keyboard for fixing things via the command line. I also mounted the amplifier in this drawer which controlls the volume and connects the stereo mini out from the Raspberry Pi to the two speakers in the top of the cabinet. The light in the top of the cabinet also just needed a bulb replaced and the wire routing secured.
I built the majority of this when I was home on paternity leave and put all the finishing touches on it when I was stuck inside related to Covid-19 and the total project ended up spanning a little less than a year. It's been an absolute blast building it and my son wants to play the old X-Men arcade game every night now.